Import Email Account in bulk from a CSV
Import multiple email accounts at once from a spreadsheet. Use with Maildoso, ZapMail, InboxKit and any other mailbox provider that offers CSV exports.
Written By Kevin Lawrie
Last updated About 1 month ago
Connect many mailboxes at once from a spreadsheet, instead of adding them one by one. Use this when you're bringing a list of sending accounts, Google Workspace, Microsoft 365, custom SMTP, or ESP infrastructure, into getsignals to use as Email Senders.
What this does and doesn't do
What it does: uploads a CSV of mailbox rows, lets you map each product field to a CSV column or set one shared value for every row, previews which rows are valid, then connects them using the same SMTP and IMAP checks as adding a mailbox individually.
What it doesn't do:
OAuth or "Sign in with Google." This is still BYO app password or SMTP AUTH, the same as a single mailbox connection.
Buy or provision domains or mailboxes for you.
Import Signature, Tags, or Default Linked Social Sender. Those are set individually on each mailbox afterward, in Mailbox Settings.
⚠️ Important on credentials: Sender email and Password are always used for IMAP (receiving). The same password is also used for SMTP (sending) unless you separately map an SMTP username and/or SMTP password. There is no separate IMAP username field, only sender email and password.
Google Workspace and Microsoft 365 need App Passwords or their equivalent here too. Standard account passwords will usually fail.
Step 1: Open the importer
Go to Mailboxes and click Bulk import.
Step 2: Optionally download a sample CSV
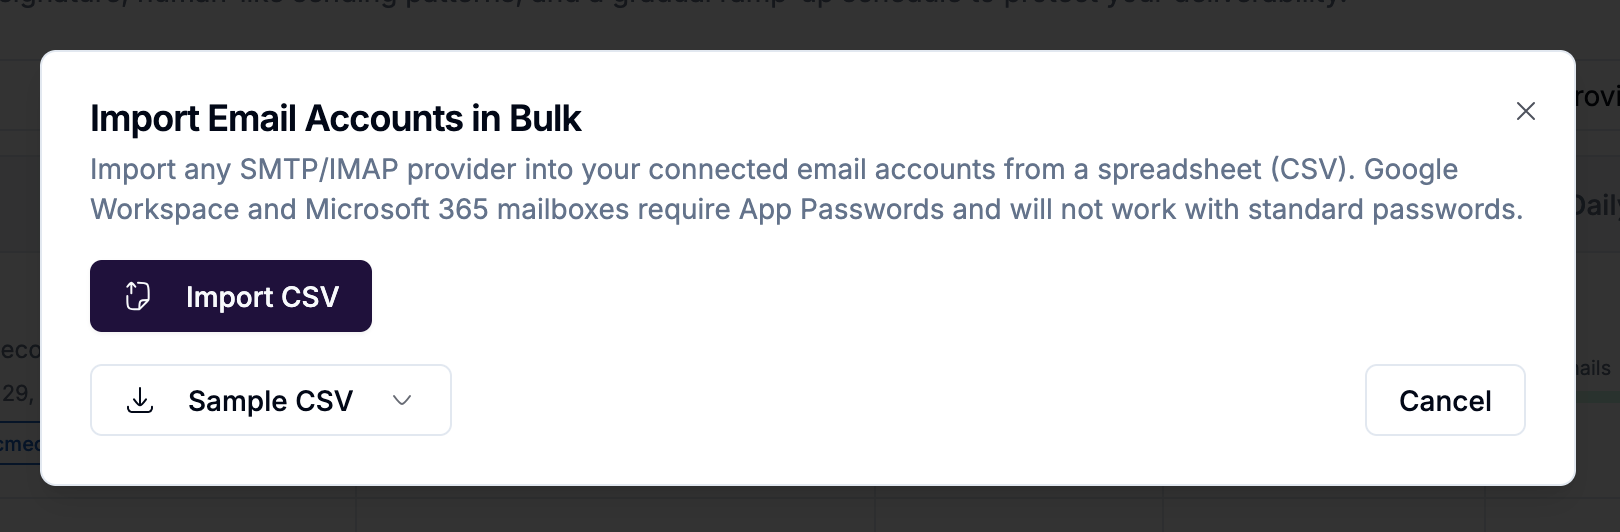
Before you upload anything, click Sample CSV to choose a starting template:
The sample CSV option disappears once you've started mapping or importing, so grab it first if you want it.
Step 3: Upload your file
Click Import CSV and choose a .csv file with a header row and at least one data row.
You'll land on the mapping screen, with your filename and row count shown.
Step 4: Map fields
For every mailbox setting, choose one of three options:
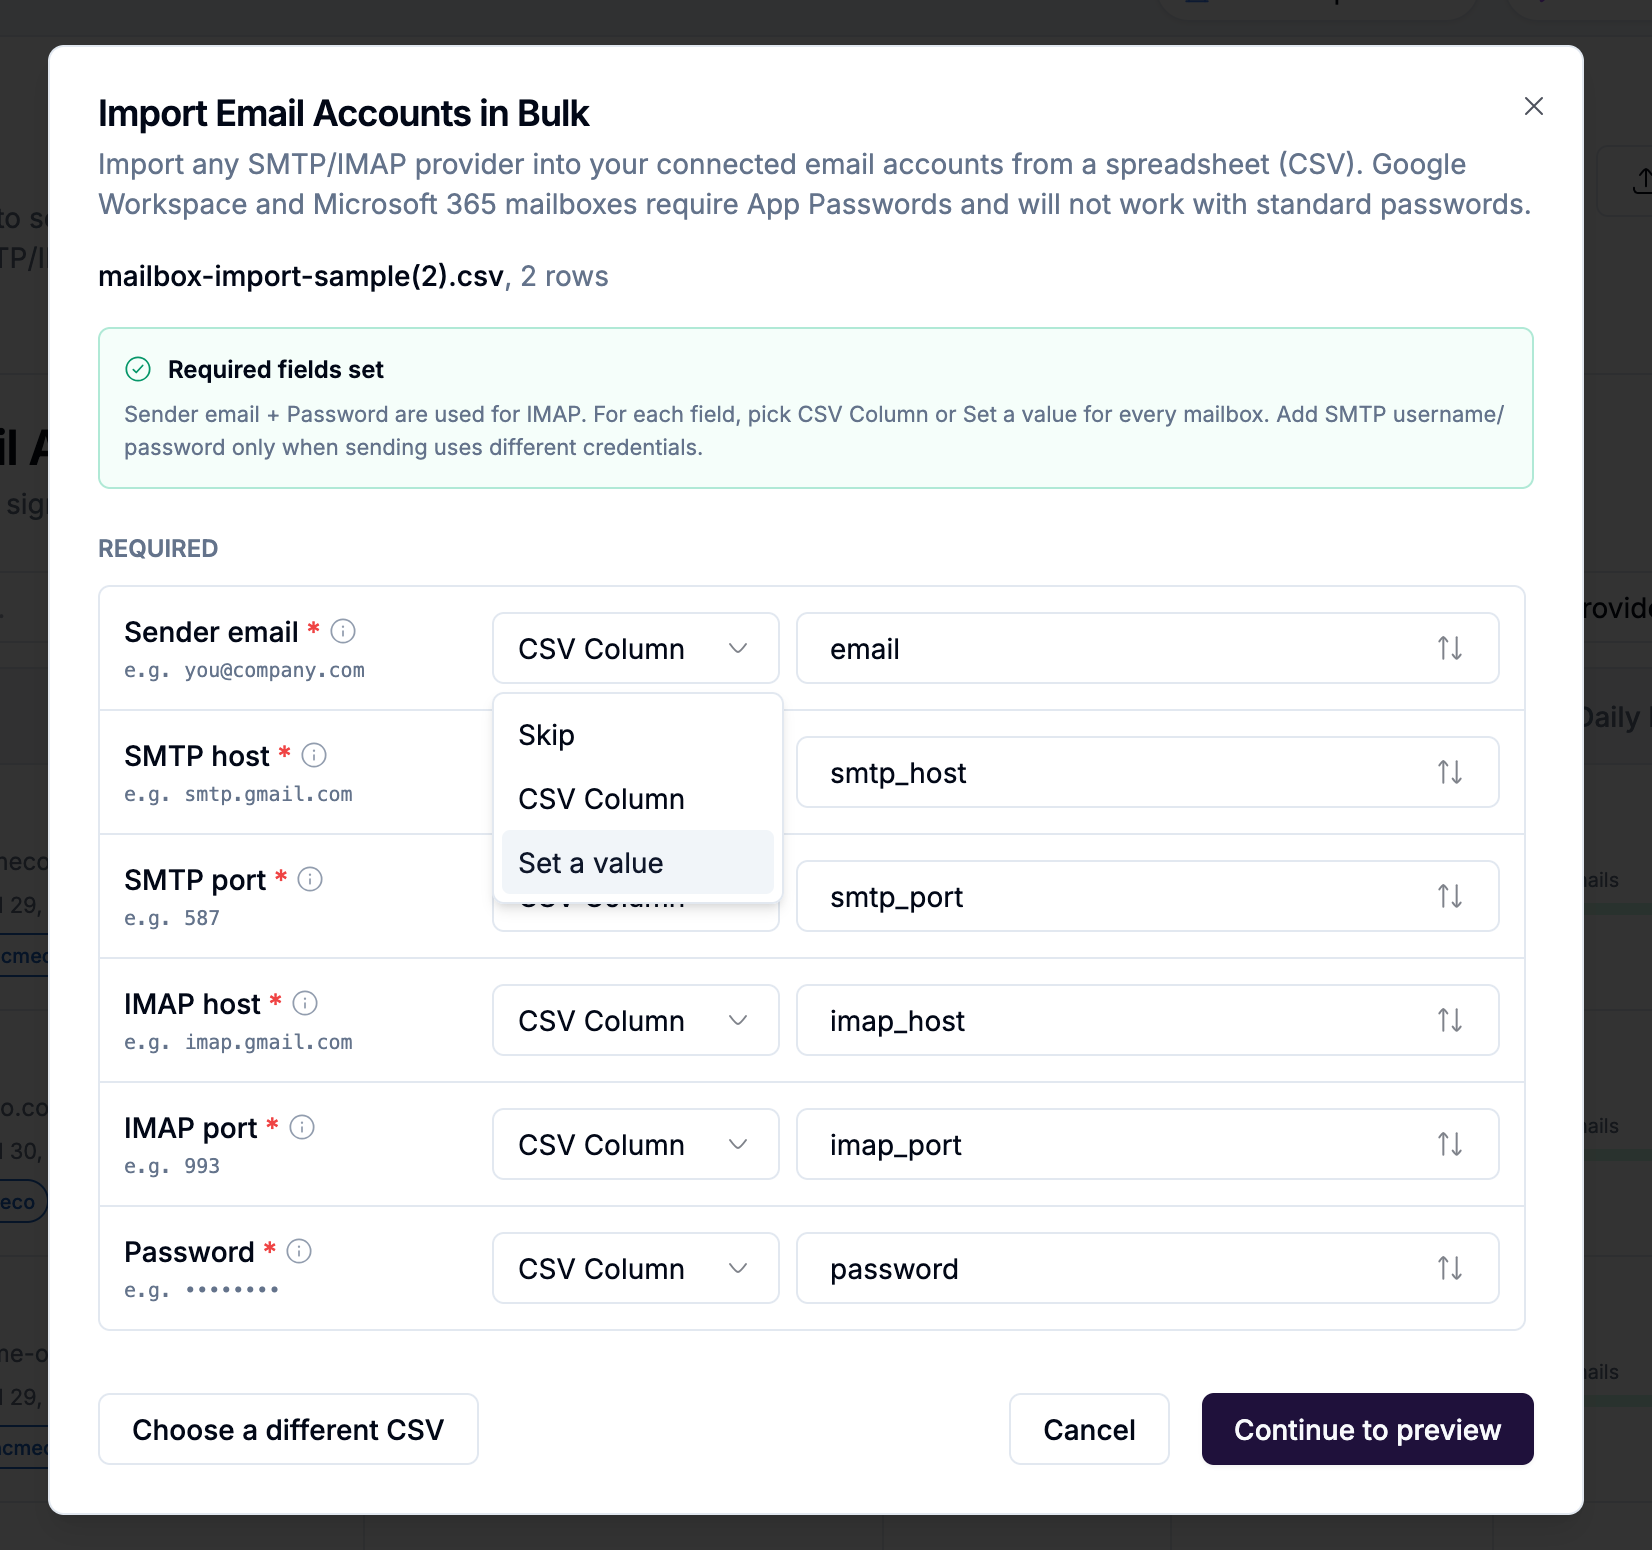
Matching column headers are auto-suggested where possible, for example a column named smtp_host will likely map itself to SMTP host automatically. You can override any suggestion.
Required fields
If your CSV has no port columns at all, the importer pre-fills SMTP port 587 and IMAP port 993 as a shared value automatically, adjust if your provider needs something different.
Optional fields
Skipped optional fields fall back to defaults: daily limit 30, ramp-up on starting at 5 with an increment of 2, inbox sync set to campaign replies only.
Not available in bulk import
Set these individually on each mailbox after connecting, in Mailbox Settings:
Signature
Tags
Default Linked Social Sender
Step 5: Preview
Click Continue to preview. You'll see a table with Row, Email, SMTP host and port, Daily limit, Status, and Notes for each mailbox.
Status shows as Pending (ready to import) or Invalid (something needs fixing, check the Notes column for why).
From here you can go back to mapping, cancel, or click Import N mailbox(es), which only counts the valid rows.
Step 6: Import
Click Import. The system connects each valid row using the same SMTP and IMAP probe as a single mailbox connection, and shows live progress.
When it finishes, you'll see final counts: connected, failed, and skipped.
If anything failed or was skipped, you can:
Download errors as a file (this never includes any passwords)
Retry failed rows, if workspace capacity still allows it
Start a new import with a different CSV
⚠️ Note: Workspace mailbox capacity still applies during a bulk import. If your workspace has hit its limit, remaining rows may show as Cap reached rather than connecting.
Sample CSV columns (for reference)
Standard template:
email,from_name,password,smtp_host,smtp_port,imap_host,imap_port,daily_limit_emails,daily_limit_humanize,daily_limit_humanize_min_pct,pacing_min_minutes,pacing_max_minutes,ramp_up_enabled,ramp_up_start_max,ramp_up_increment,inbox_sync_mode Separate SMTP template adds smtp_username and smtp_password to the same columns above. It still includes password for IMAP. There is no separate IMAP username or password column in either template.
Inbox sync accepts campaign_matched or all_inbound. Fields that behave like on/off toggles accept true/false or 1/0.