Campaign Actions and Configuration Reference
A complete reference for the actions available in Campaign sequences, how each step is configured, and what the messaging actions like Invite Notes, DMs, InMail, Email and Comments.
Written By Kevin Lawrie
Last updated About 1 month ago
This article is the practical reference for building a campaign, across LinkedIn, email, or both.
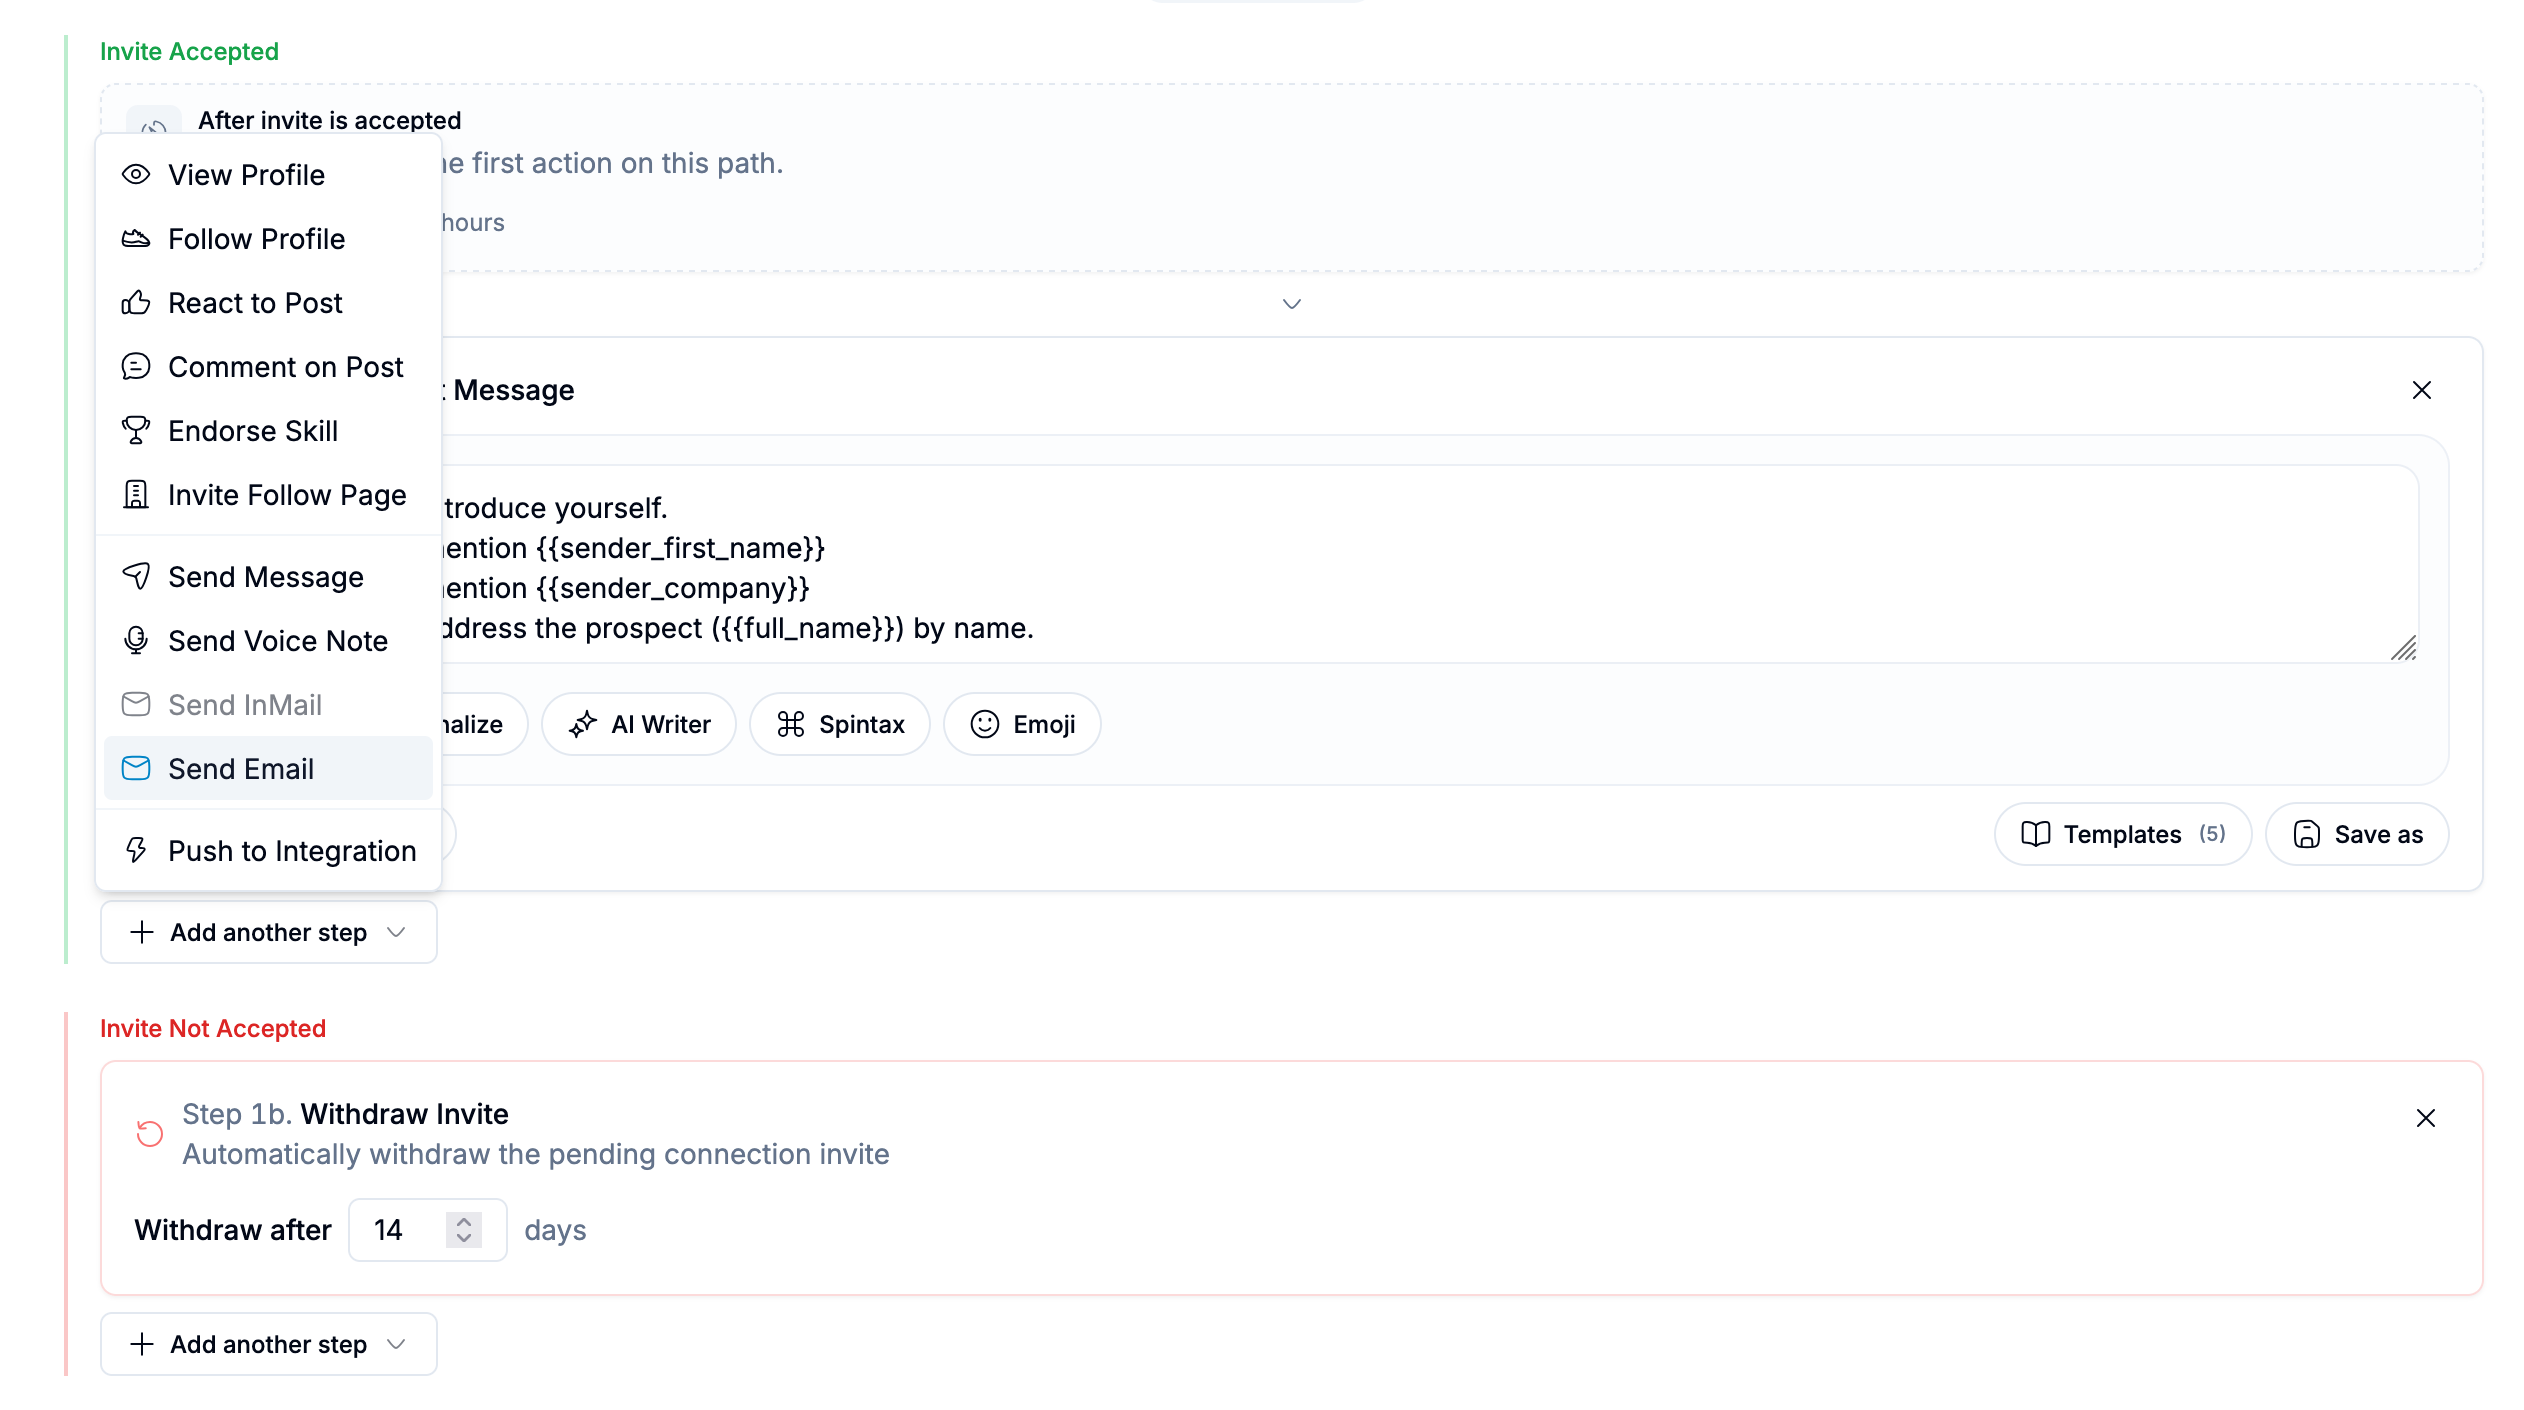
If the strategy articles explain why you would build a flow, this article explains what each action does and how the campaign UI works when you configure it.
Use this when you want a clear map of:
the available campaign actions, on every channel
where those actions belong in the flow
what configuration options each action supports
what the text-area menus do for Notes, Messages, InMail, Email, and Comments
How campaign actions are organized
Campaigns are built from a set of actions arranged across the flow.
A campaign can include:
Warm-up actions
the invite step
accepted-path actions
not-accepted-path actions
integration handoff actions
Not every action belongs in every place, and not every action is available on every channel type. Warm-up and the invite step are Social-only concepts; there's no equivalent on Email only campaigns, where the flow is simply a linear sequence of Send Email steps.
Warm-up actions
Warm-up happens before or around direct outreach and is designed to build familiarity, add public context, or route leads elsewhere before the main messaging flow begins. These are available on Social only and Social + Email campaigns.
View Profile. Use this when you want the campaign to make a lightweight first touch before outreach.
Follow Profile. Use this when following the person is part of the relationship-building motion.
React to Post. Use this when you want a lightweight public engagement action tied to a recent relevant post. Configuration includes reaction type, and optionally engaging as a company page when supported by the flow.
Comment on Post. Use this when the campaign should add a public comment to the post before later outreach. Configuration includes comment template, post-aware context through variables, mention support, and optional company-page engagement where applicable.
Endorse Skill. Use this when the campaign should create a small profile-level touch before a later outreach step.
Invite to Follow Company Page. Use this when the relationship is already strong enough or already connected enough that inviting the person to follow your company page makes sense. This is a campaign-level company page growth action, not an AI Agent capability.
Send Email. Use this on a Social + Email campaign to reach the lead through the paired mailbox after they've accepted, a natural place for a nurture touch that doesn't compete with your LinkedIn cadence. Full configuration details are below, since email has more setup options than the other accepted-path actions.
Invite step
The invite step is the main branch point in Social only and Social + Email campaigns.
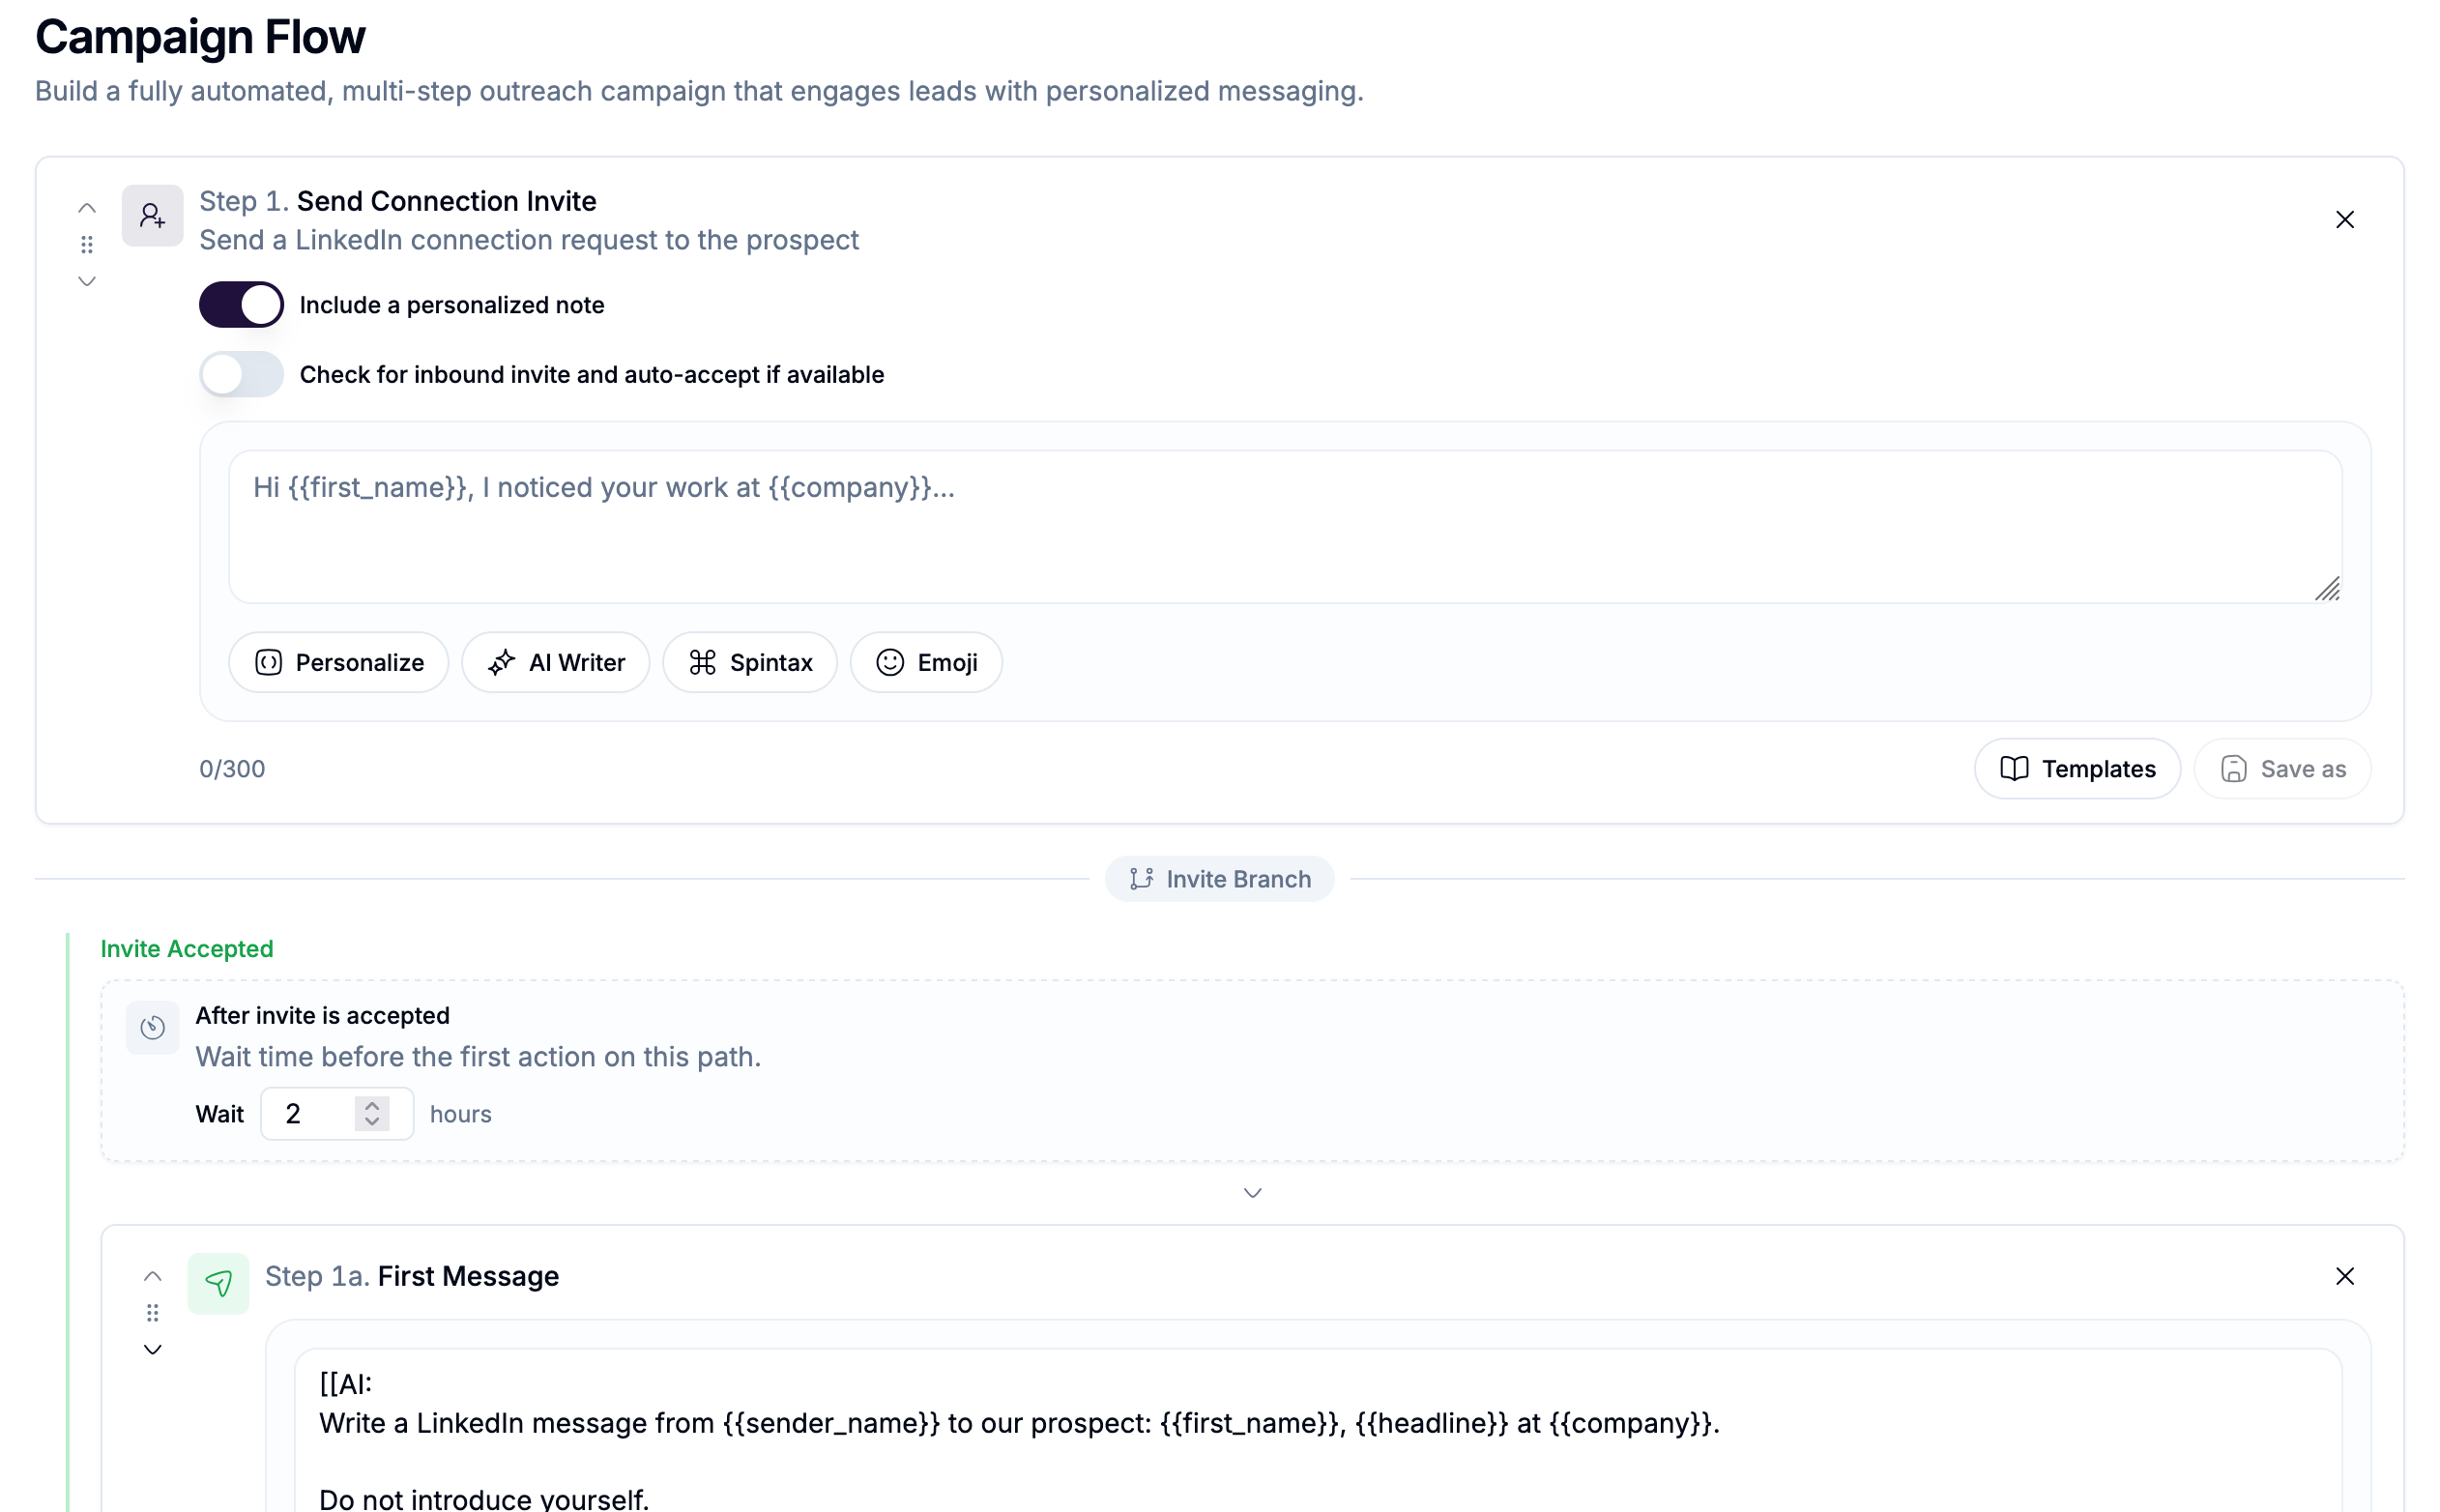
This is where the flow usually decides whether the person receives a connection invite, enters the accepted path, enters the not accepted path, or is handled differently because they are already connected.
Include a personalized note. Turns on the note field so you can customize the connection request.
Connection note. This is the text area for the invite note. Use it for merge variables, AI blocks, spintax, emojis, and saved templates. Keep in mind that the invite note has a strict character limit, so this field should stay concise.
Check for inbound invite and auto-accept if available. Use this when you want the campaign to detect whether the other person has already sent an inbound invite and accept it automatically instead of sending a duplicate request.
Email only campaigns skip this step entirely and move straight into a linear sequence of Send Email steps.
Accepted-path actions
The accepted path is what happens after the person accepts the invite or is already connected and enters the post-invite branch, on Social only and Social + Email campaigns.
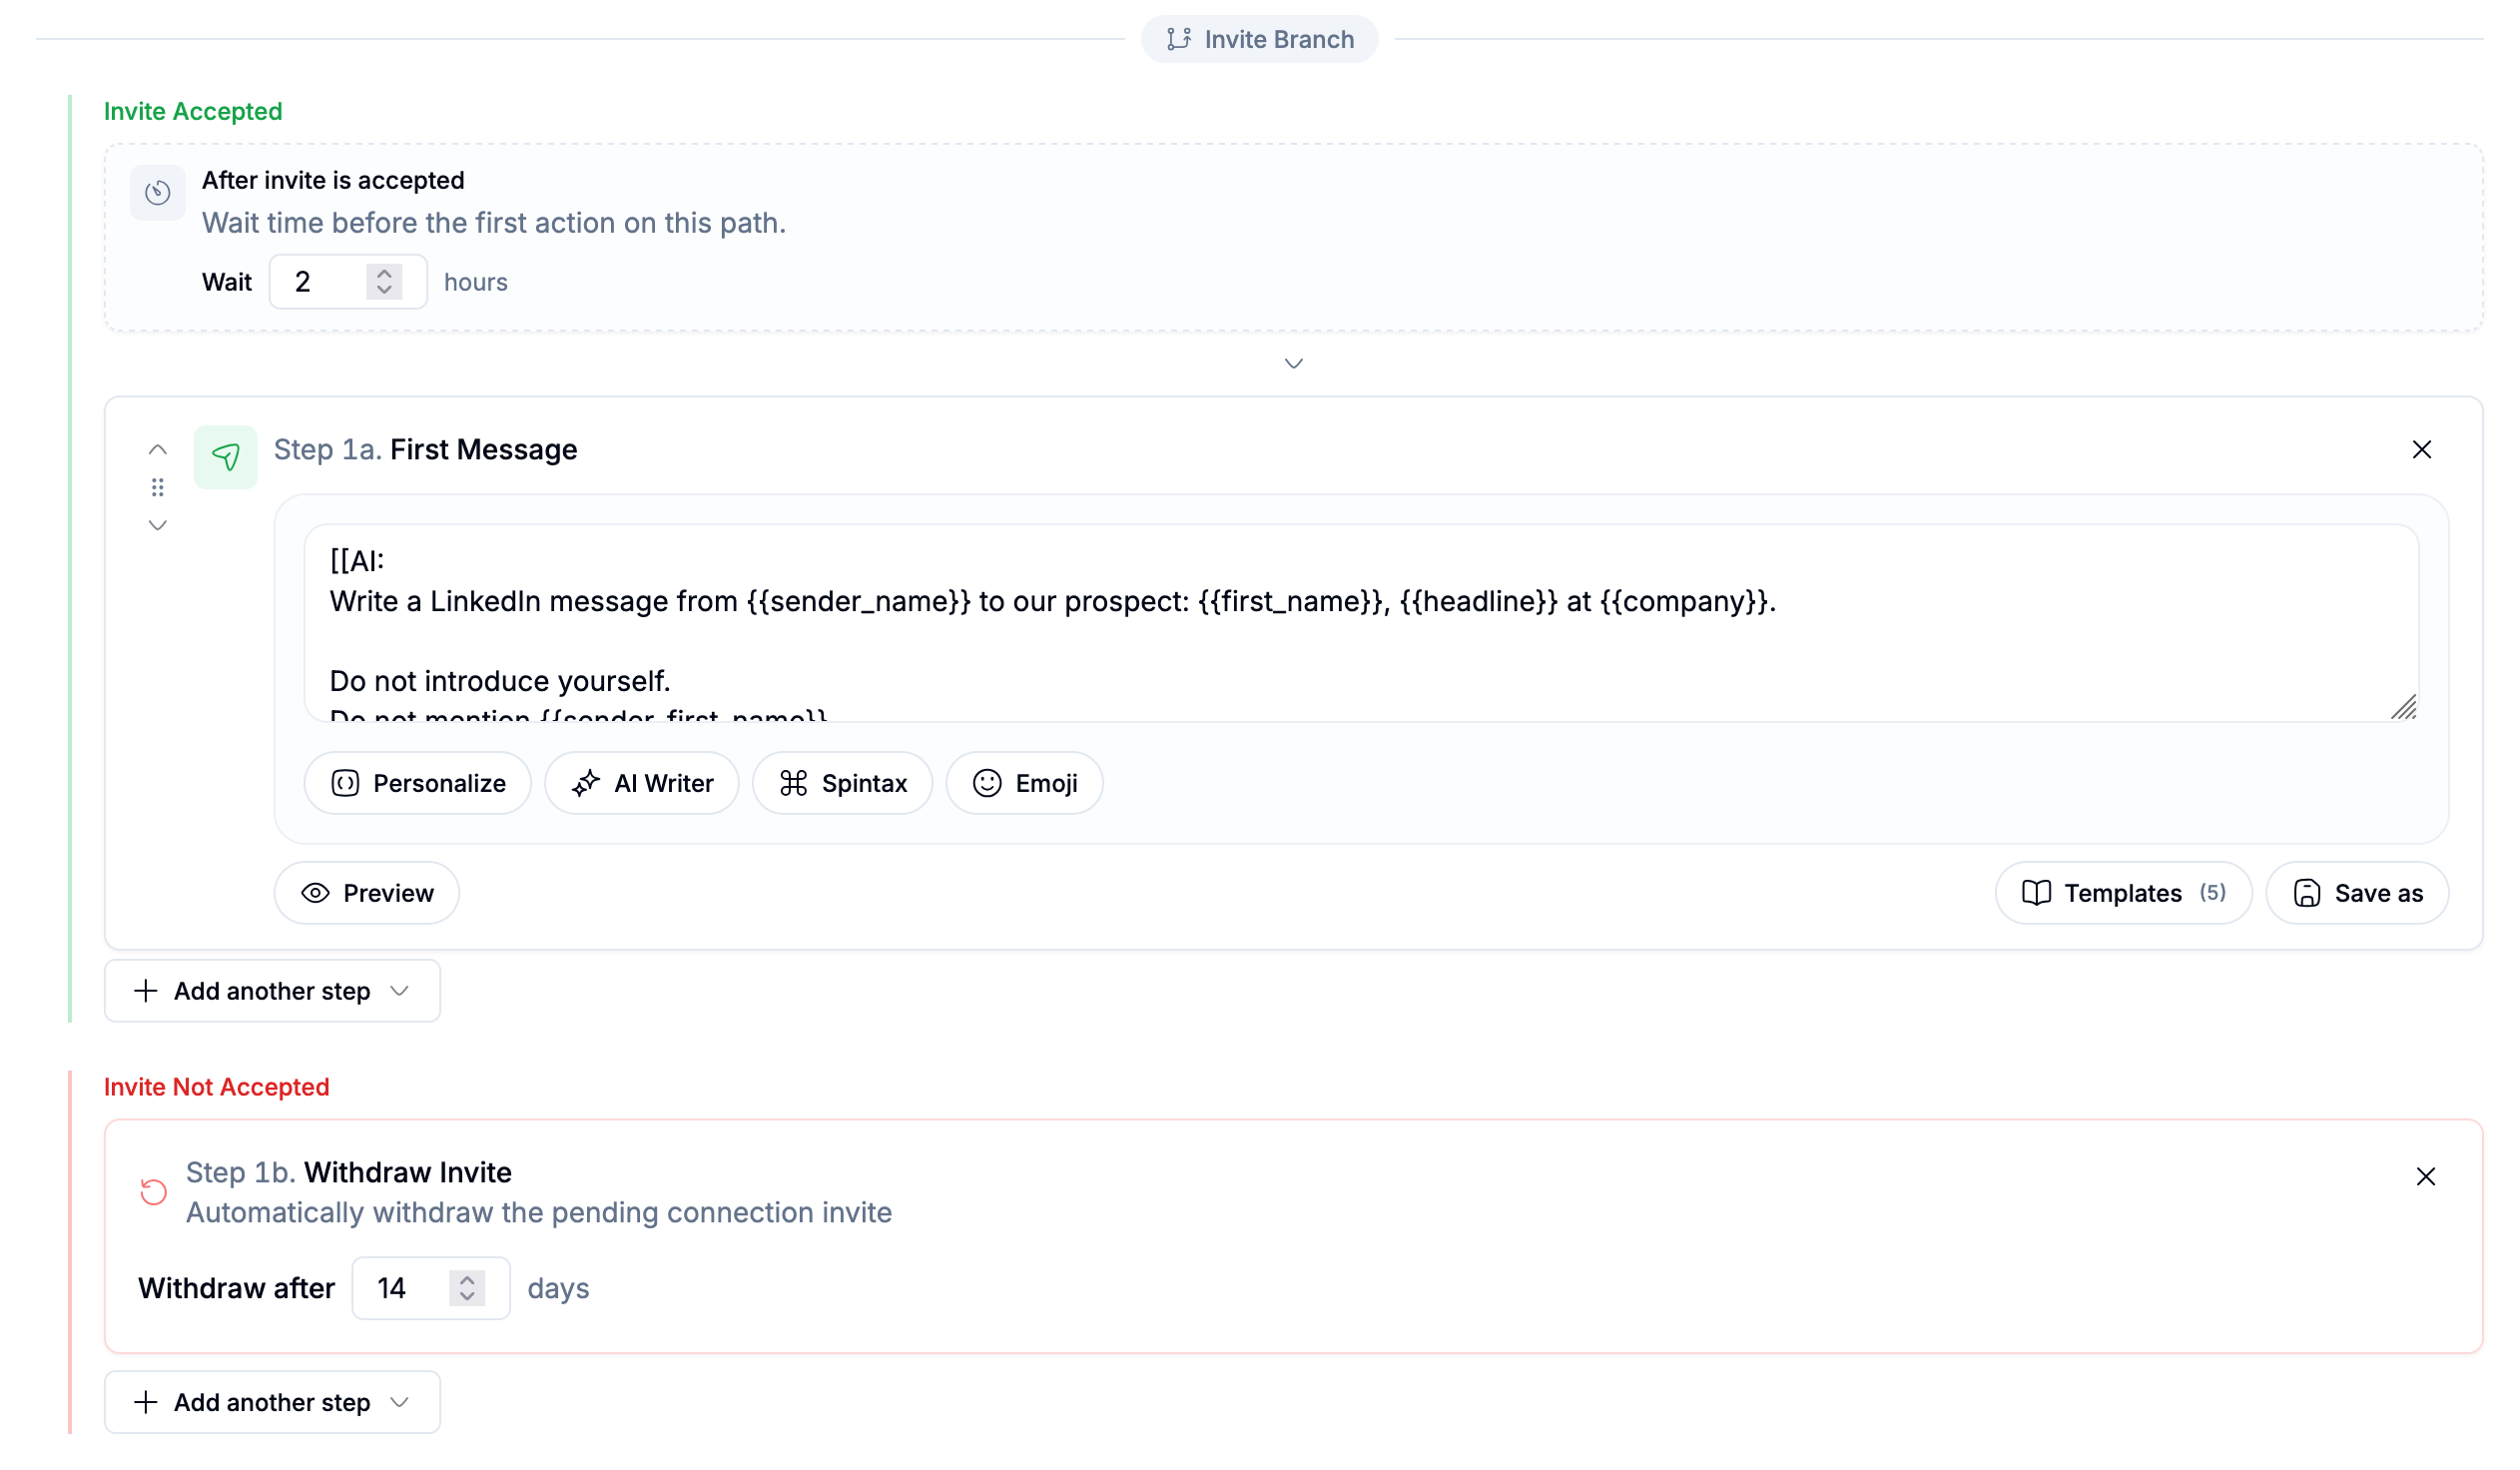
Send Message. Use this for direct messages after connection exists. Configuration includes message body text area, merge variables, AI prompt insertion, spintax, emojis, AI preview, and saved templates.
Send Voice Note. Use this when you want the campaign to send a voice note instead of, or in addition to, a text message. Configuration centers on the recorded or uploaded voice note asset rather than text generation.
Send InMail. Use this when the flow requires an out-of-network premium-style message step. Configuration includes subject line, message body, merge variables in both fields, AI only in the body, spintax, emojis, preview for the body, and saved templates for the body.
Send Email. Use this on a Social + Email campaign to reach the lead through the paired mailbox after they've accepted, a natural place for a nurture touch that doesn't compete with your LinkedIn cadence. Full configuration details are below, since email has more setup options than the other accepted-path actions.
Warm-up-style engagement after acceptance. Warm-up-style actions can also be used after connection, depending on the flow design. That includes view profile, follow profile, react to post, comment on post, and endorse skill.
Push to Integration. Use this when the best next move after connection is to hand the lead into another channel or connected workflow.
Not accepted path
The not accepted path handles people who do not connect, on Social only and Social + Email campaigns.

Withdraw Invite. Use this when you want the system to clean up stale pending invites after a set amount of time.
Send InMail. Use this when the person did not connect but you still want a premium message path.
Send Email. Use this when the campaign is Social + Email and the lead has a verified email address. This is often the strongest option in this branch, since it reaches the person through a channel that never depended on the invite being accepted in the first place.
Push to Integration. Use this when a lead should leave the campaign and continue elsewhere even if the invite was not accepted.
Send Email: full configuration
Send Email is available on Email only campaigns as the entire flow, and on Social + Email campaigns as an accepted-path or not-accepted-path action. It requires at least one mailbox assigned on the Senders step.
Not supported on Send Email steps: attachments, and Cc/Bcc. Both are available when replying manually from the Unified Inbox, just not on an automated sequence step.
Campaign details that affect action behavior
Some campaign-level settings affect how actions behave throughout the flow.
Fast track 1st-degree connections. If enabled, existing 1st-degree connections skip the invite and continue on the accepted path.
Exclude 1st-degree connections. If enabled, existing 1st-degree connections are removed from the campaign rather than continuing through it.
End campaign when someone replies. If enabled, remaining steps stop as soon as the lead replies, on either channel if you're running Social + Email.
Reply sentiment detection. This enables AI-based reply classification, working the same way across LinkedIn and email replies.
AI writer. This enables campaign AI writing features where supported.
Text-area tools: what the menus do
This is one of the most important parts of the UI.
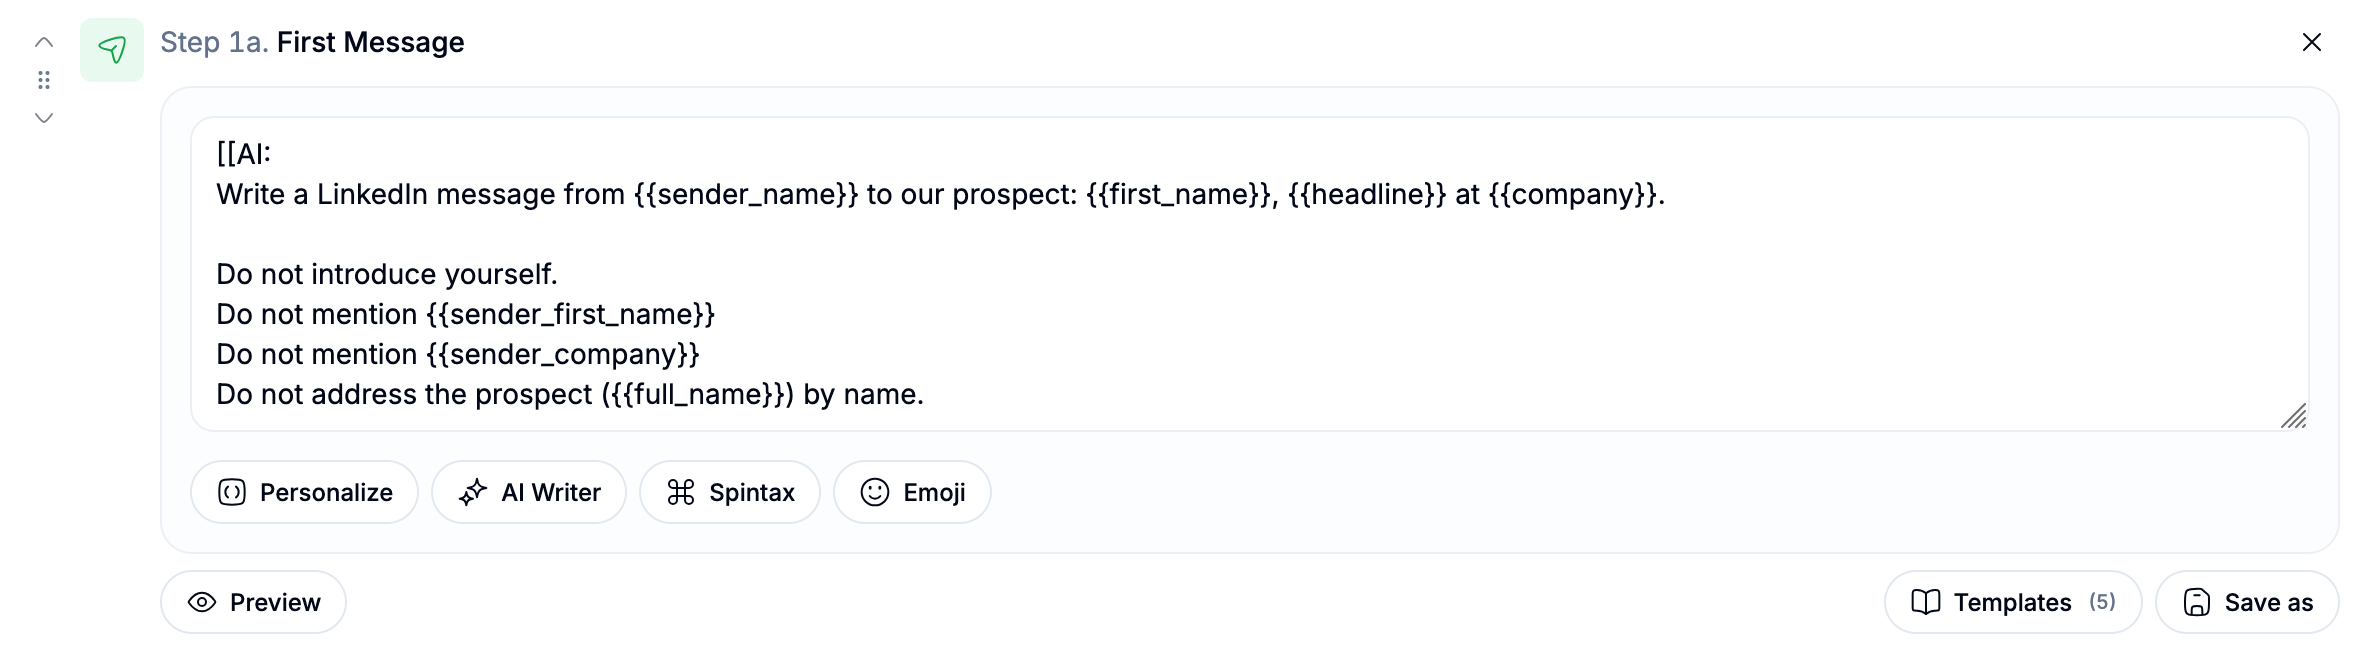
Notes, Messages, InMail body, Email, and Comments all support different versions of the text-area toolset.
Personalize. The Personalize menu inserts merge variables. These variables can pull in context such as contact data, Signal data, sender data, campaign data, post context, thread context, workspace firmographics, and custom variables. On email, this also includes {{mailbox_signature}}. Use this when you want structured context inserted directly into the text.
AI Writer. The AI Prompt menu inserts [[AI:...]] blocks. Use this when you want the system to generate text from context instead of only inserting variables. This is where Signal-first personalization becomes much more powerful. AI can write from the Signal, the post, post history, comment history, sender context, company context, and workspace firmographics. Not available in InMail or email subject lines.
Spintax. The spintax menu inserts [[Spin: ... | ... | ...]] variation blocks. Use this for greetings, transition phrases, soft closes, and light variation in stable copy. Spintax changes phrasing, not strategy. On email specifically, spintax is also part of protecting deliverability, since identical templated messages sent at volume are an easy pattern for spam filters to flag.
Emoji. The emoji tool inserts emojis into supported text fields. This is optional and should be used carefully depending on brand voice and campaign style. On email, we'd lean toward using these sparingly at most; a message that reads as plain, human text tends to perform better than one that reads as styled marketing copy.
Preview. Preview is available in the surfaces where generated output needs verification. Use preview when you want to see how merge tags, spintax, and AI output are likely to resolve before the step runs. This is especially useful for messages, InMail body, email, and comments.
Templates. Template tools let you save and reuse common copy patterns. Use them when you have proven note, message, or email structures, want consistency across campaigns, or want to speed up setup without rebuilding copy from scratch.
Surface-specific text area guidance
Connection Notes
Best for short, clear personalization, one clean reason to connect, and Signal-aware relevance in a compact space.
Supports variables, AI, spintax, emojis, and templates.
Use with restraint because of the note length limit.
Messages
Best for richer context-aware outreach, direct follow-ups after connection, and continuing the Signal context.
Supports variables, AI, spintax, emojis, preview, and templates.
This is usually the most flexible text surface in the campaign builder.
InMail
Subject line. Supports variables and spintax. Do not treat this like a full AI writing surface. Keep it short and direct.
Message body. Supports variables, AI, spintax, emojis, preview, and templates. This is the richer part of the InMail step.
Subject line. Supports variables and spintax, same rule as InMail: no AI Writer here. Keep it short, human, and testable on its own.
Body. Supports variables, AI, spintax, emojis (in HTML), preview, and templates, plus {{mailbox_signature}} and {{opt_out_link}}. Choose plain text or Rich HTML; plain text is the safer default for deliverability and reply rates, so reserve HTML for cases where you genuinely need it.
Because email doesn't have a Warm-up phase to build familiarity first, the body often has to do more work carrying the Signal context on its own, particularly on the first email in a sequence.
Comments
Best for public engagement on the post that surfaced the opportunity, thread-aware brand or sender participation, and Signal-first Warm-up and visibility building.
Our signal-driven, context-aware approach to Campaigns also ensures your visibility remains consistent and relevant by chaining the underlying Signal post across all campaign actions. That translates into your Campaign reactions to posts and comments are executed on the same underlying post that was surfaced in your signal.
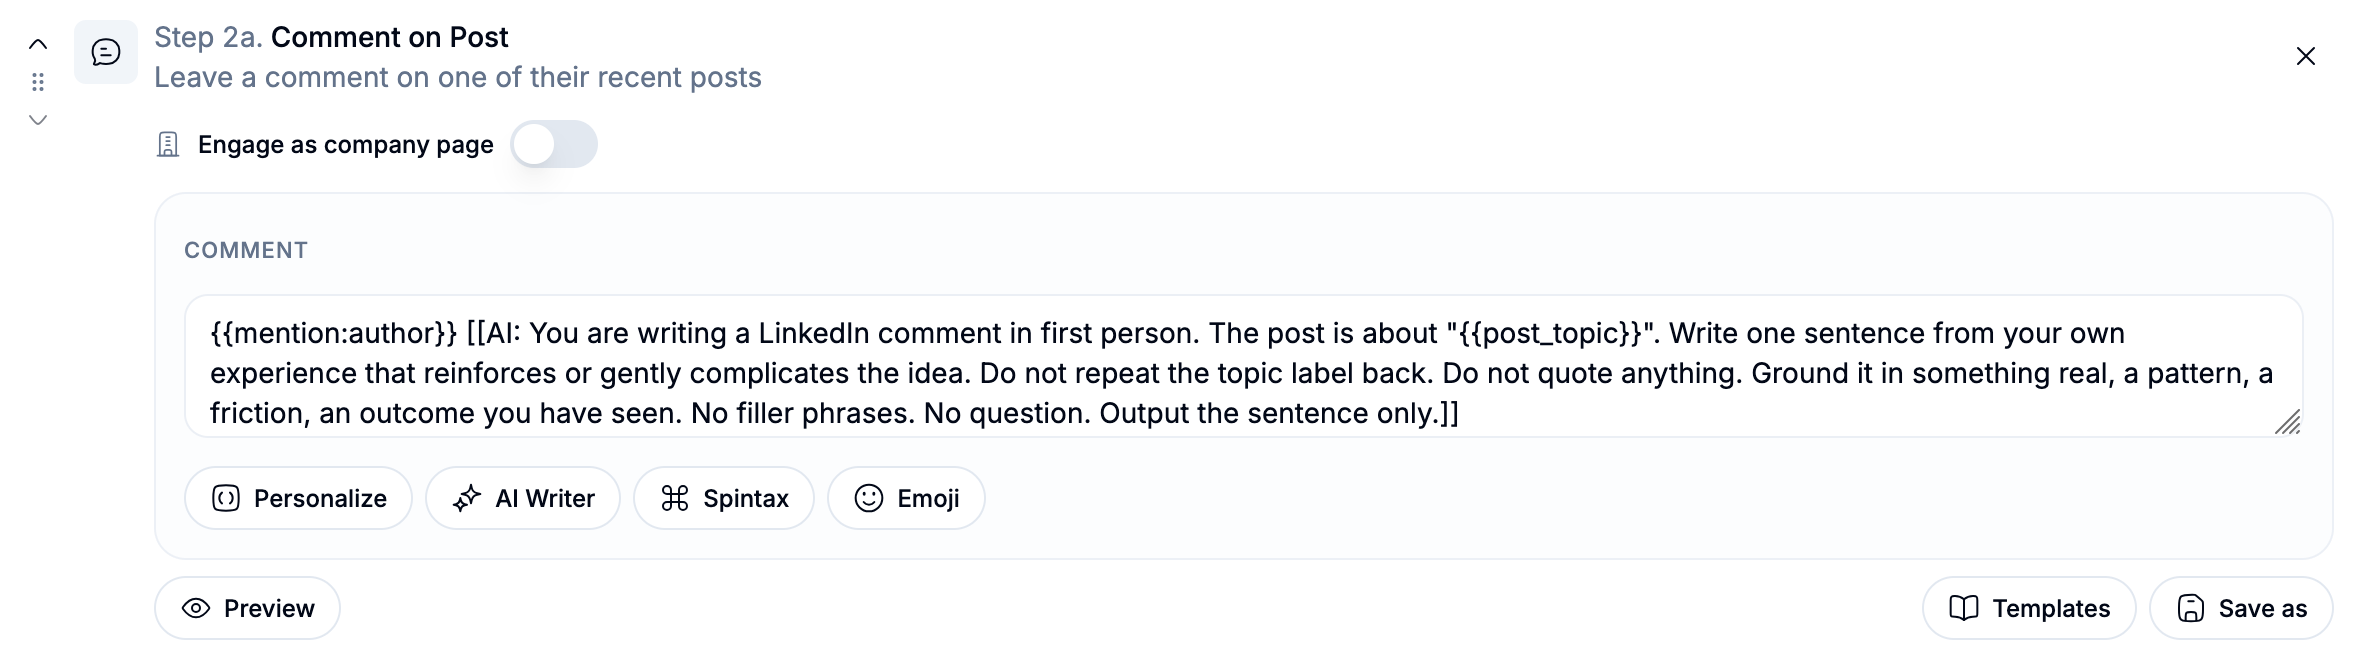
Supports variables, mentions, AI, spintax, emojis, preview, and templates.
The strongest comment context usually comes from {{signal_post_full}}, {{list_post_comments}}, and {{mention:author}}.
How to think about action selection
A simple way to think about campaign actions:
use Warm-up actions to build familiarity or route intelligently, where the channel supports it
use the invite step to create the branch, on Social only and Social + Email
use accepted-path actions to continue the conversation, on whichever channel fits the moment
use not-accepted actions to handle stalled or alternate outcomes, including a fallback to email when the invite doesn't land
use integration actions when another system should take over
on Email only campaigns, build a simple linear sequence since there's no branching structure to plan around
This keeps the campaign flow coherent instead of turning it into a random list of steps.
Common mistakes to avoid
Using every action just because it exists. More steps do not automatically create a better campaign.
Overloading text fields. Use the right amount of personalization for the surface. Notes should stay short. Comments should stay native to the thread. Messages and emails can carry more context.
Treating comments like private messages. Comments are public and should feel like they belong in the conversation.
Forgetting that company-page actions and sender actions do different jobs. Choose the actor based on whether you want personal familiarity or brand visibility.
Skipping preview on complex copy. If you are using variables, AI, and spintax together, preview helps prevent weak or awkward output, especially on email where formatting doesn't always render the way it looks in the editor.
Defaulting to Rich HTML for email without a reason to. Plain text is the safer starting point on nearly every campaign; treat HTML as the exception, not the default.
Final advice
Think of the campaign builder as a system for turning Signals into the right next actions, on the right channel.
Each action has a role. Each configuration option shapes how that role is carried out. And the text-area tools help you keep the message tied to the Signal that made the lead relevant in the first place, whether that message ends up as a comment, a note, a message, an InMail, or an email.
That is how campaign setup in getsignals stays both flexible and context-aware.