Build a Campaign from Scratch
Create personalized, multichannel outbound campaigns that create warm conversations
Written By Kevin Lawrie
Last updated About 1 month ago
The campaign builder is a wizard with five sections: Details, Senders, Campaign Flow, Leads, Schedule. That's a map of where settings live, not a description of your outreach sequence. Inside Campaign Flow, you can add as many steps as you want, in whatever order makes sense for your use case. Nothing about the builder limits you to a fixed number of steps or a fixed structure.
Before you start
A new campaign starts as a draft. Nothing sends until you activate it, so it's safe to build, adjust, and review before going live. Once a campaign is active or paused, opening it takes you to Results instead of back into this builder. If you need to rebuild an active campaign from scratch, duplicate it first to get a fresh draft.
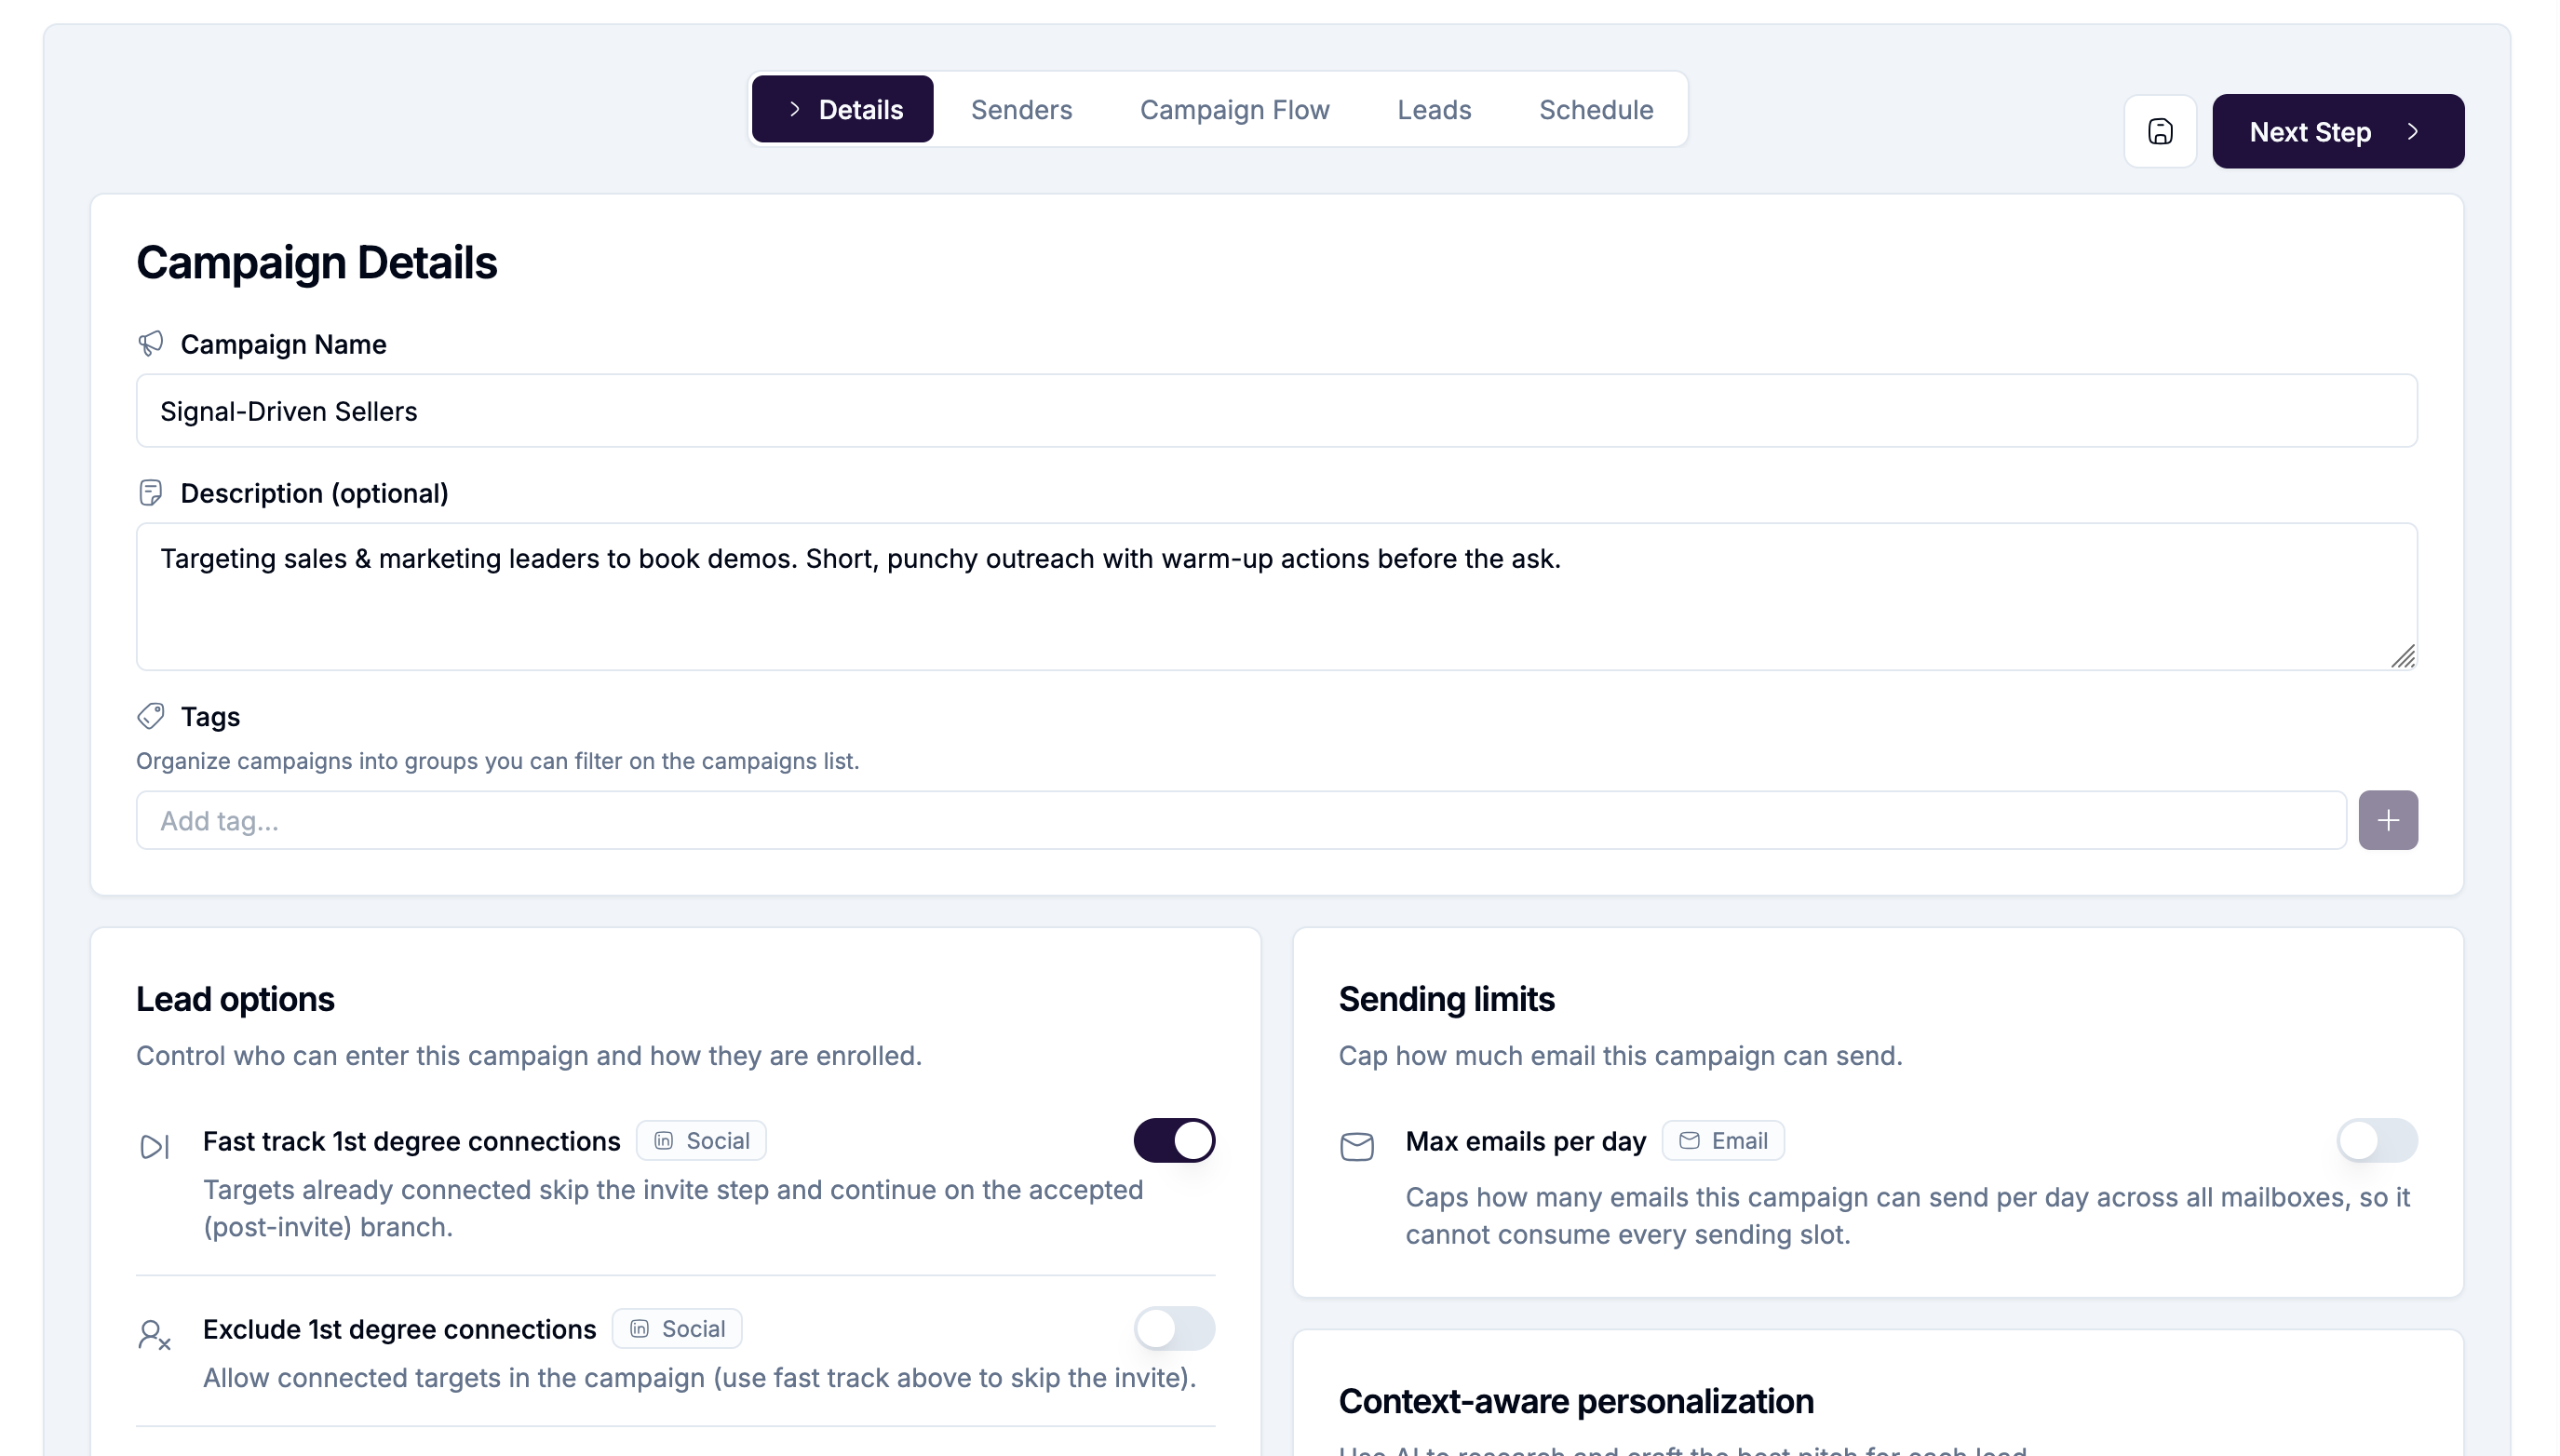
Section 1: Details
Start by naming the campaign, then configure the settings that apply across the whole thing.
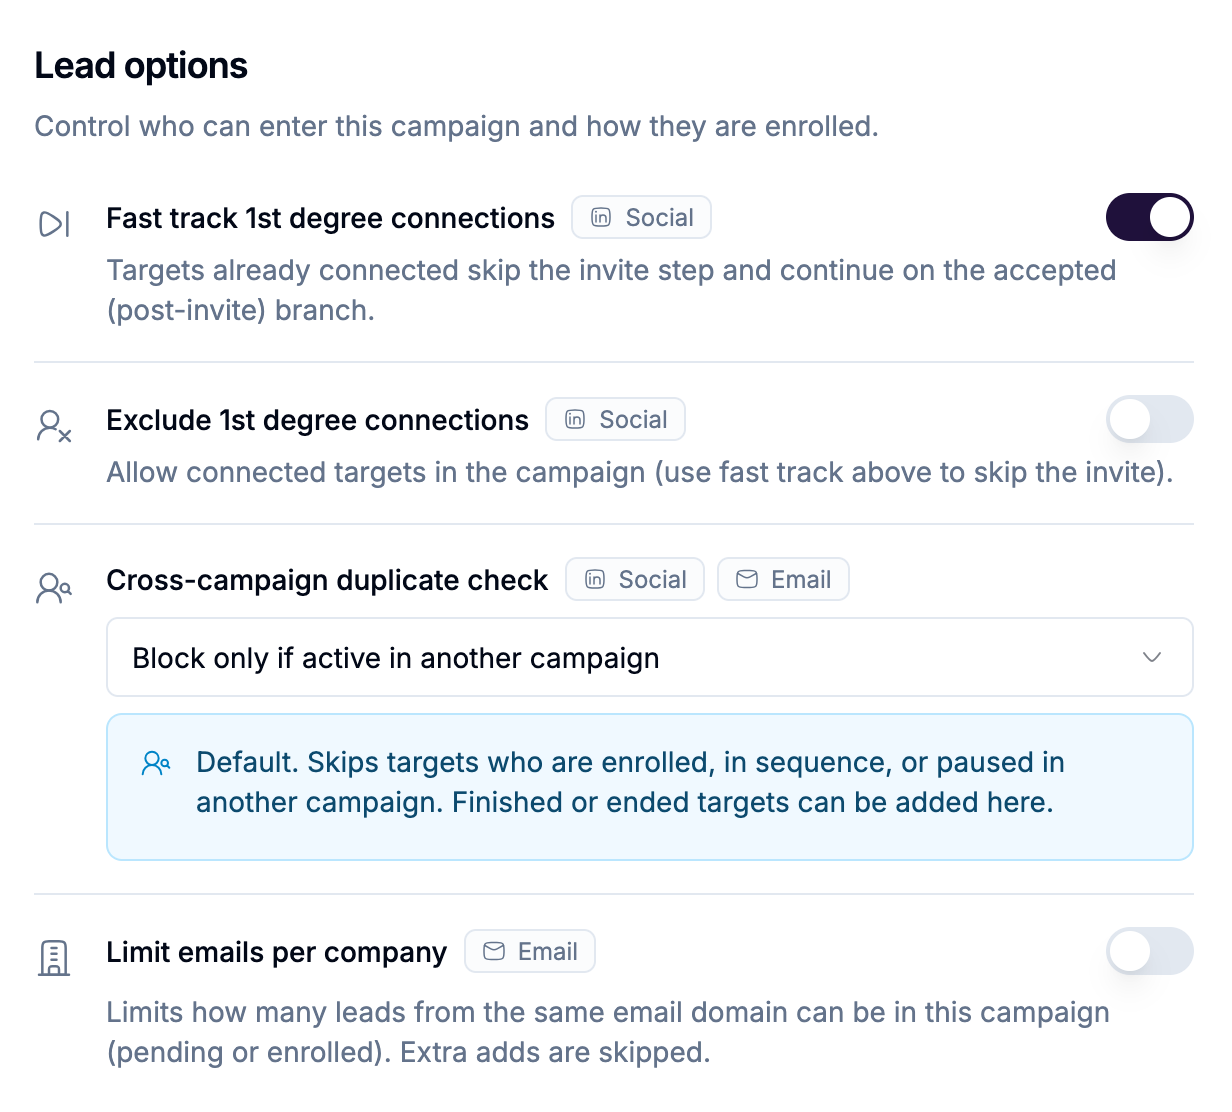
💡 Tip: You don't need to configure every setting here before moving on. Most of these have sensible defaults, and you can come back to Details at any point while the campaign is still a draft.
Section 2: Channels and Senders
Answer the question every campaign starts with: what type of campaign is this?
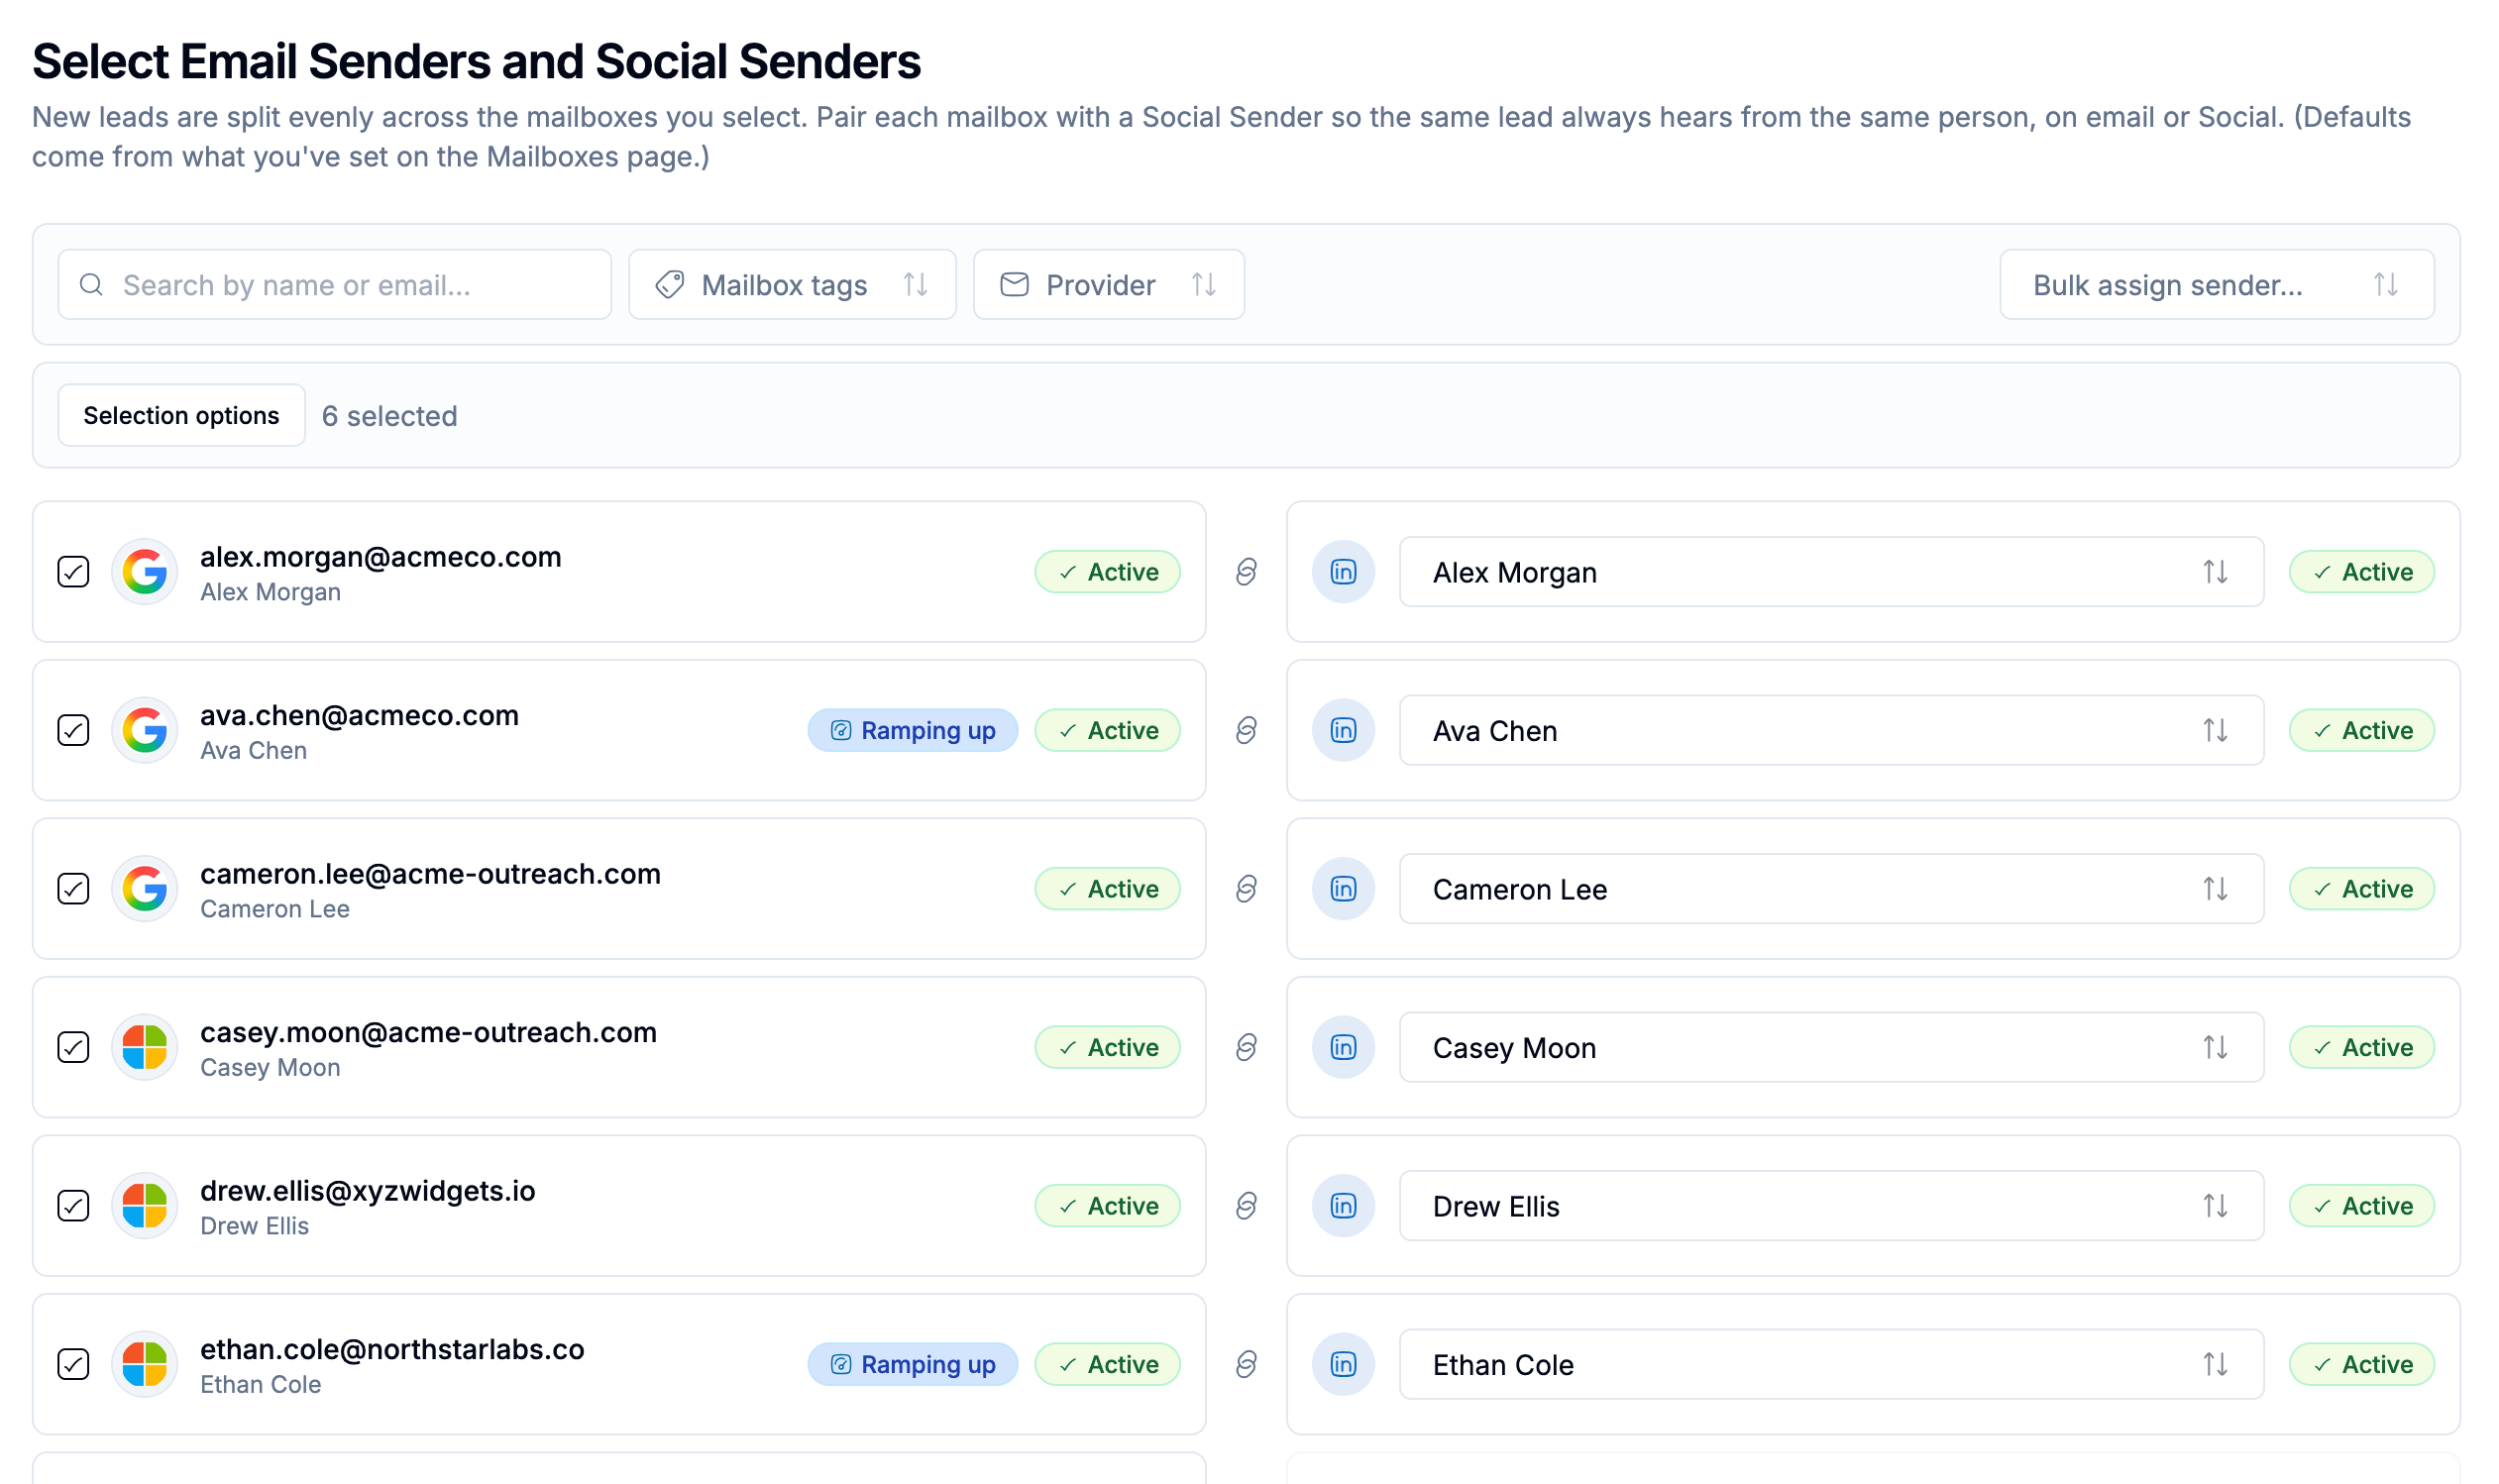
See [Assign Social Senders and understand rotation], [Assign mailboxes for Email only campaigns], and [Link mailboxes with Social Senders for Social + Email] for the full detail on each.
⚠️ Note: Switching a campaign's type after you've assigned senders clears the previous channel's assignments. Choose your type before you build anything else.
Section 3: Campaign Flow
This is where you build your actual sequence, and it's the part of the builder with the most freedom. There is no fixed number of steps, no required order, and no formula you have to follow.
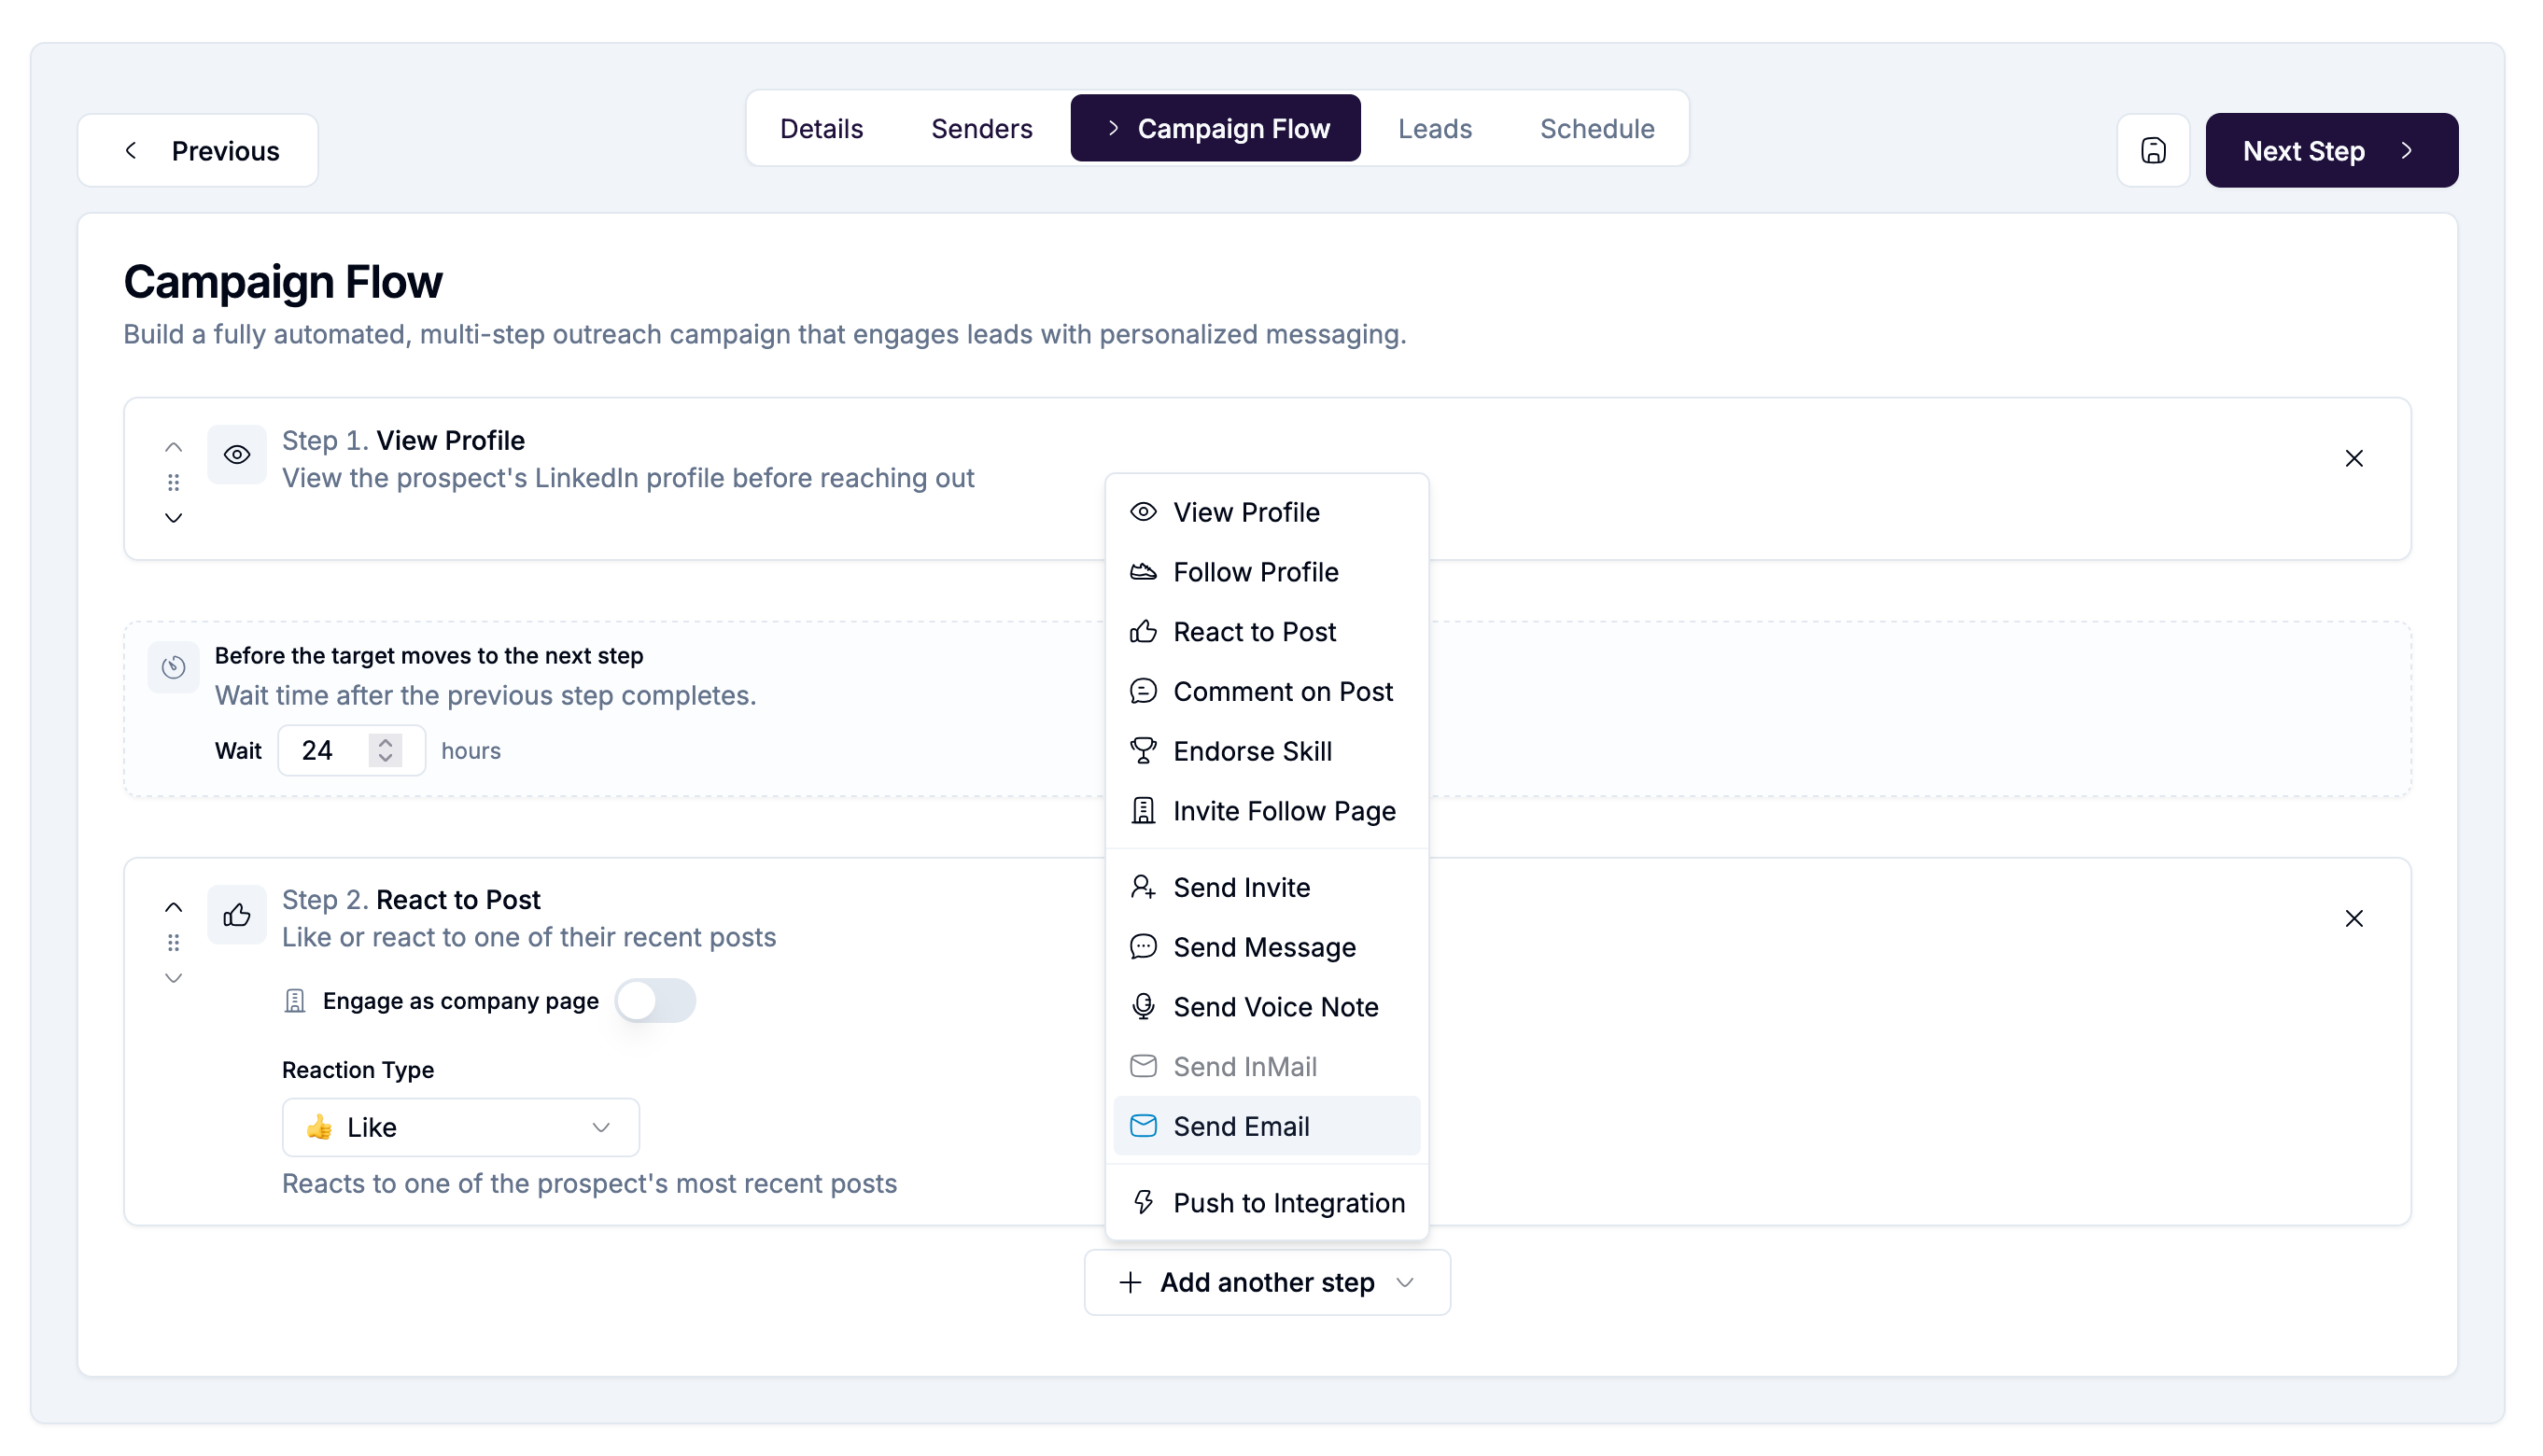
On Social only and Social + Email campaigns, the building blocks available to you include public engagement actions (viewing a profile, following it, reacting to or commenting on a post), an invite step, and a wide set of post-invite actions, direct messages, voice notes, InMail, Send Email, and Push to Integration. Use as many or as few of these as your use case calls for, in whatever order you want. Add ten steps or add two. Nothing in the product enforces a specific count or sequence.
The one real structural moment is the invite step itself. If your flow includes an invite, that step is where a genuine branch gets created: the lead either accepts or doesn't, and what happens next can differ depending on which. Everything before the invite and everything after it, on both sides of that branch, is yours to design. Even the branch itself doesn't have to change much about your approach; plenty of campaigns run the same kind of follow-up on both sides.
On Email only campaigns there's no invite step at all, since there's no connection to accept. The flow is simply however many Send Email steps you choose to build, spaced out however you like.
For each Send Email step, you'll configure:
Subject line
Body, plain text or Rich HTML
Wait time before the step runs
Threading, whether follow-ups continue the same email thread
Opt-out method
Merge tags, Spintax, and AI writer blocks where available
Preview and test
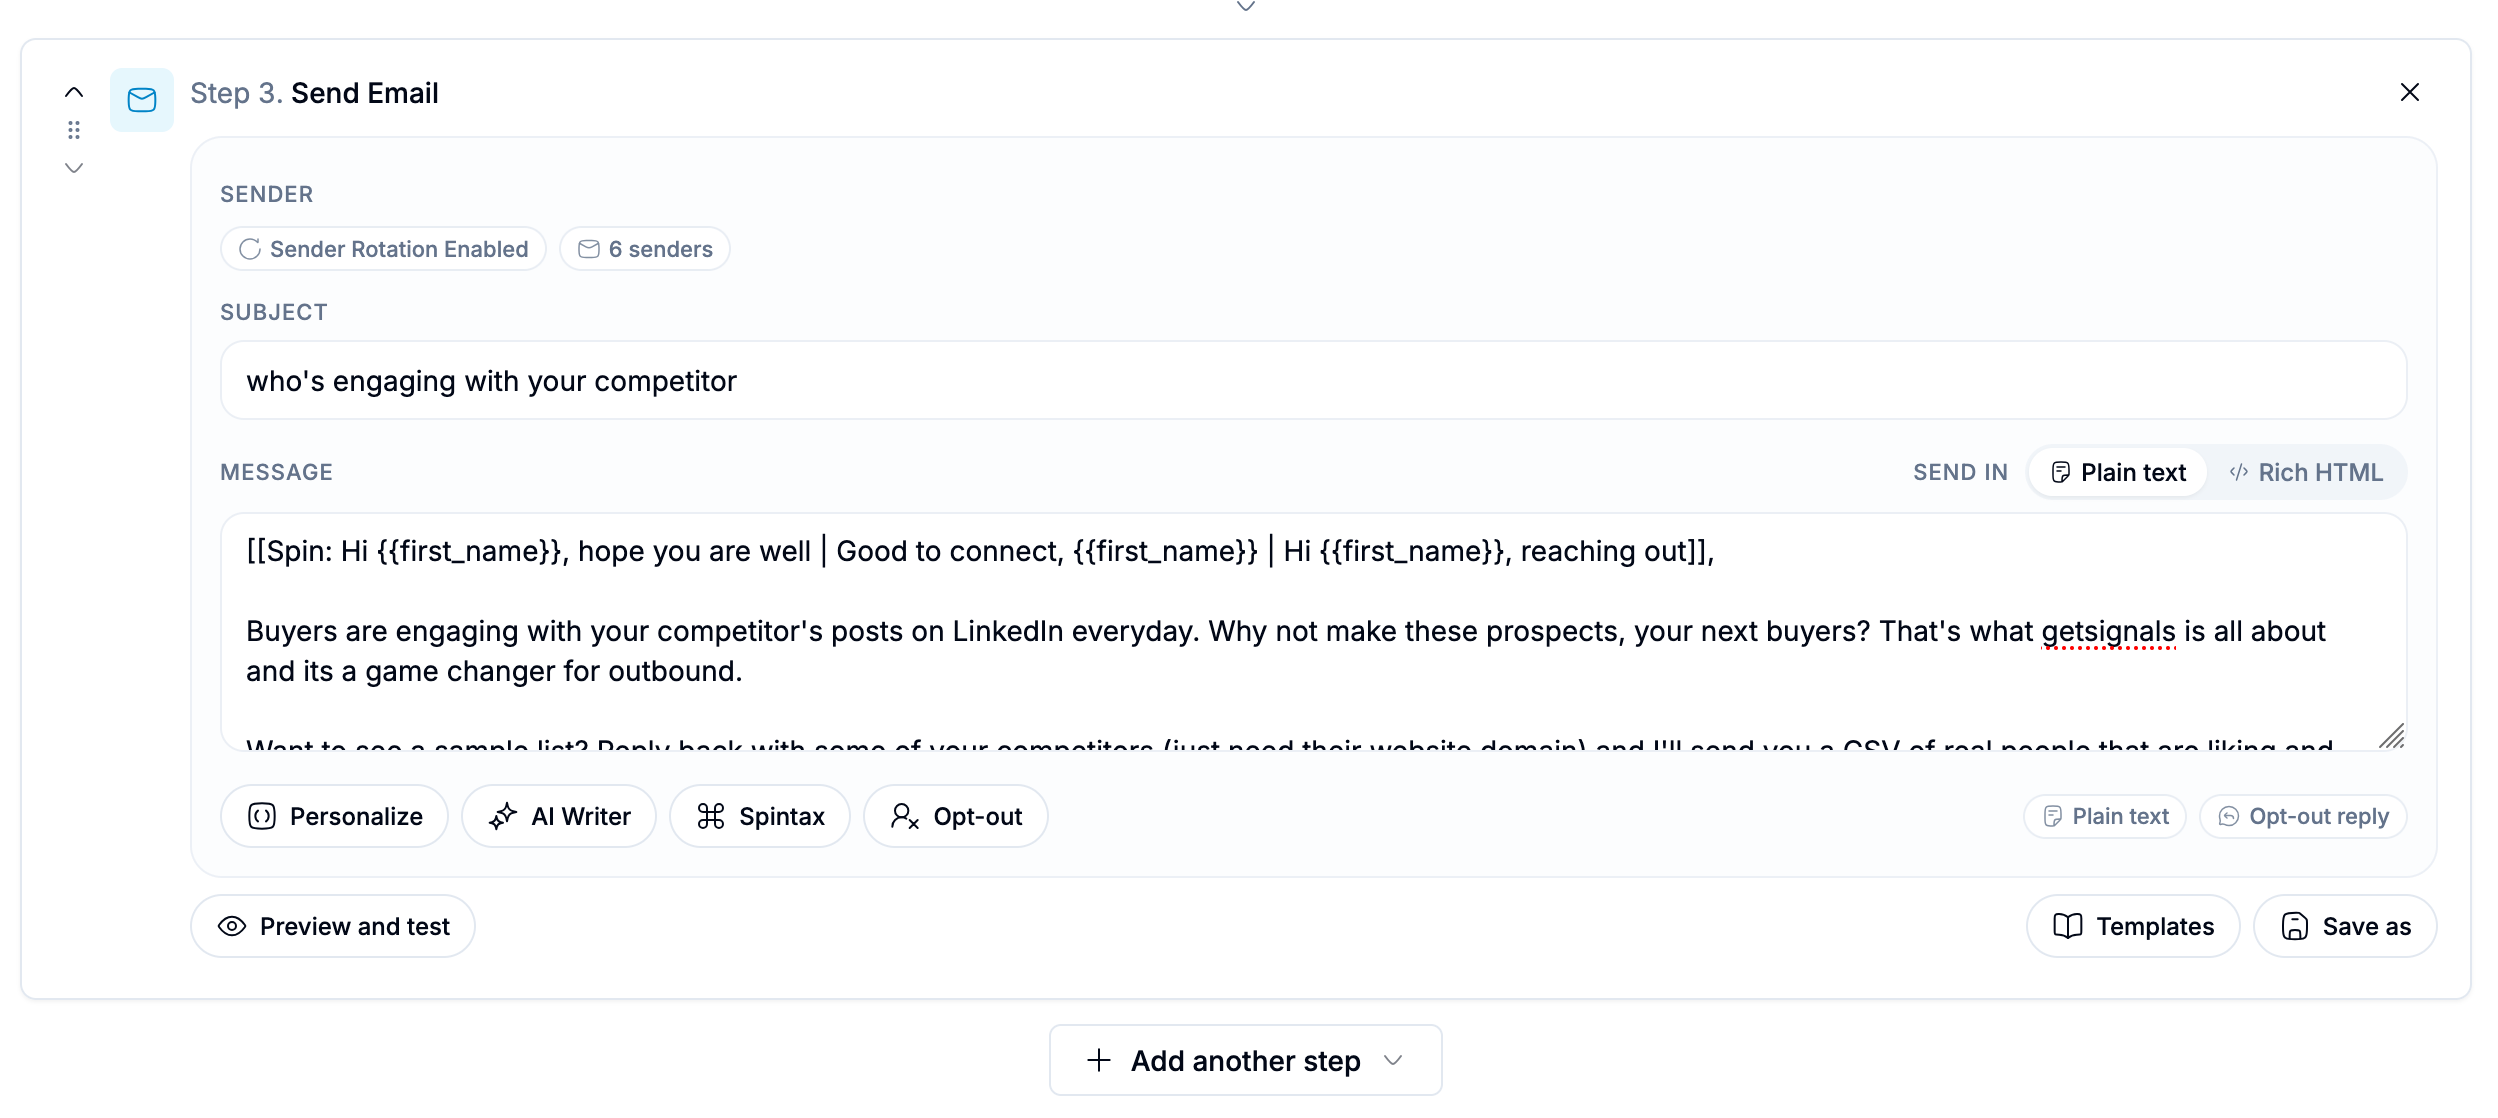
See [Build a Signal-driven Campaign Flow] for how to think through sequencing your own flow, and [Social Campaign Actions and Configuration Reference] for every available action and what it supports.
Section 4: Leads
Choose how people enter the campaign: paste, CSV, CRM import, Signal, or auto-enrolled sources like new connections and profile visitors when Social is in play.
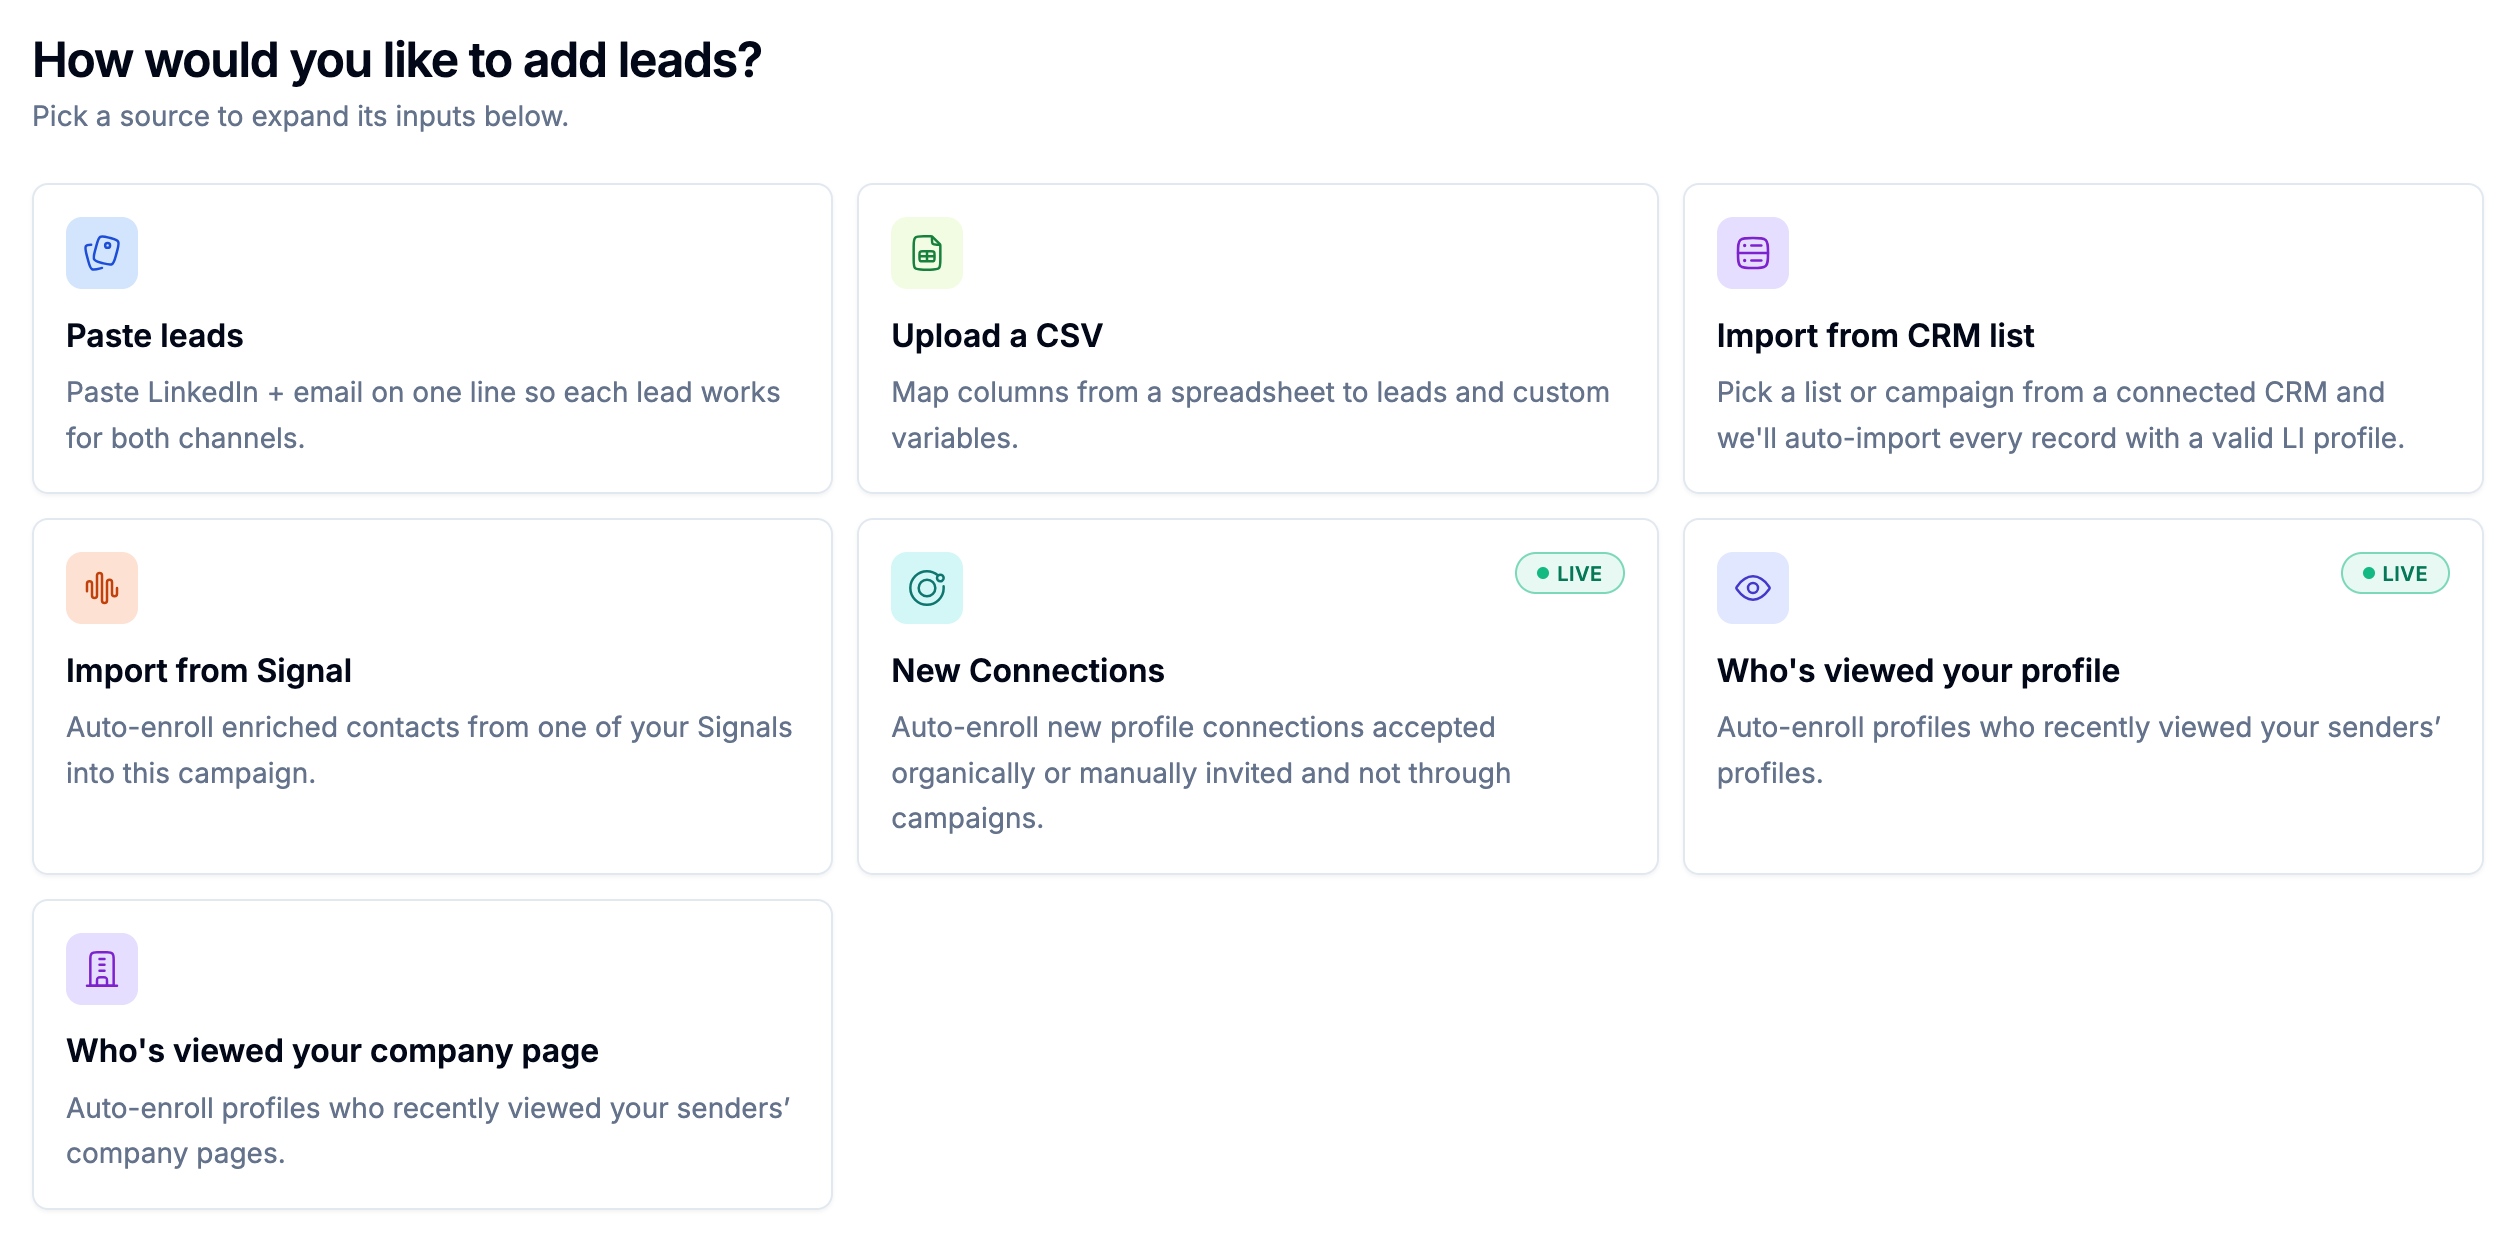
Whatever source you use, make sure your leads carry the fields your channel mix requires:
After import, review your skip reasons. Duplicates, opt-outs, bounce suppressions, and company email limits will all cause a row to be skipped rather than enrolled.
See [Add Leads to a Campaign] for the full breakdown of every source.
Section 5: Schedule and Activate
Set your active days, active hours, and timezone. The campaign only sends within that window, across every channel it uses.
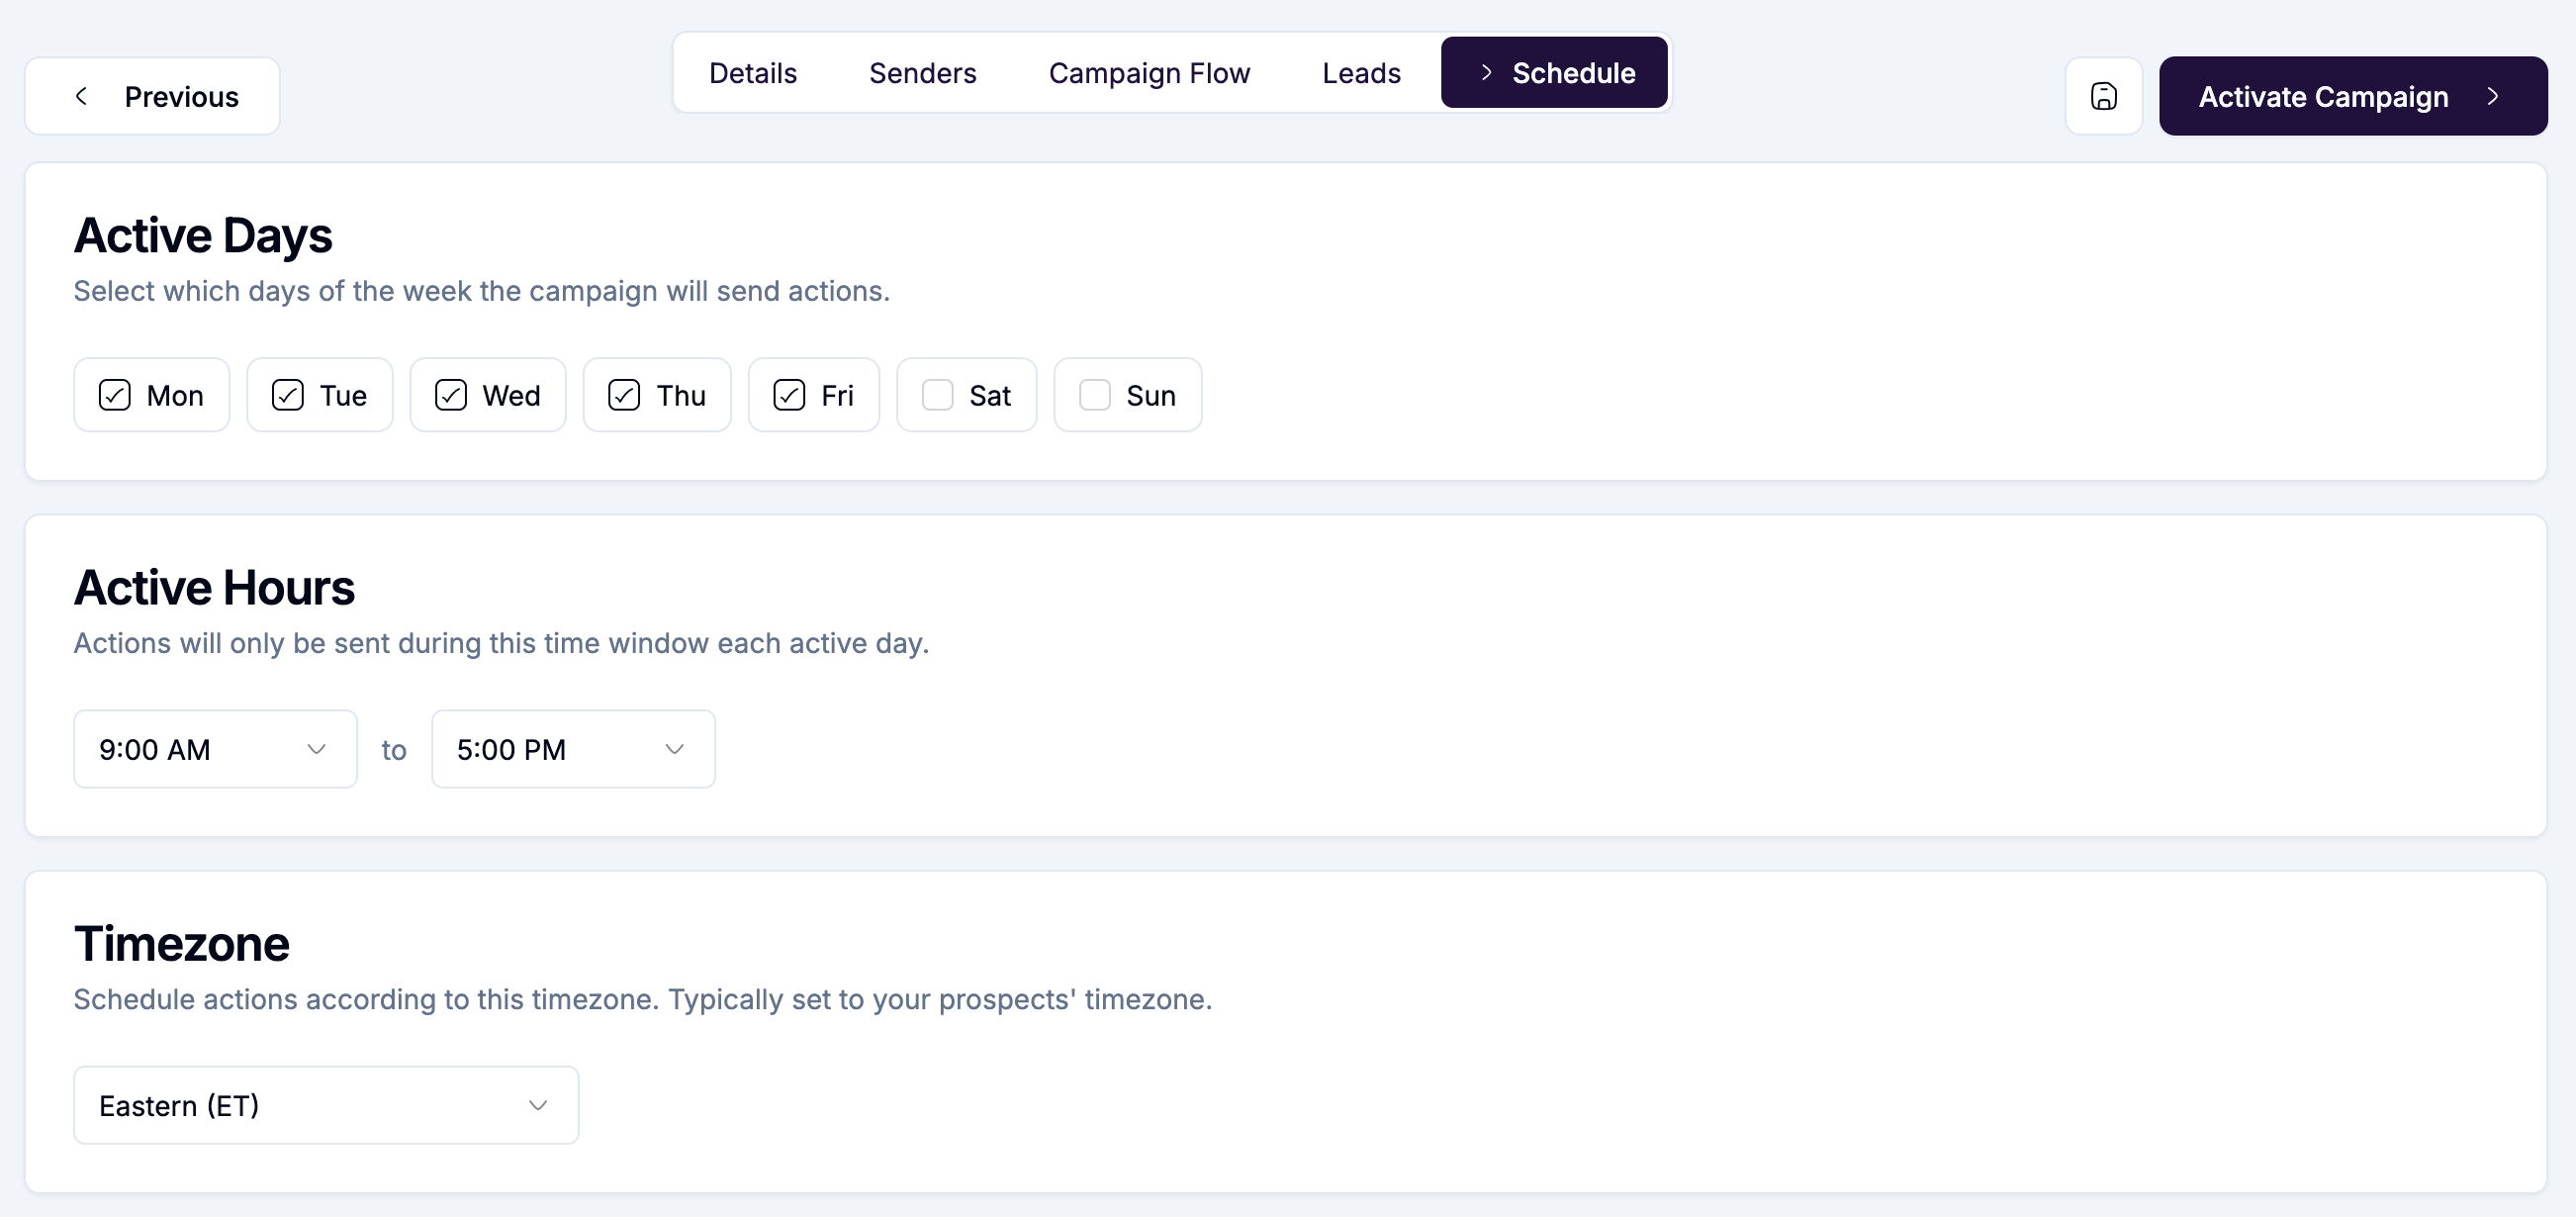
Before activating, review any mailbox ramp badges shown here, a mailbox still ramping toward its daily limit will send less volume than its target for the first stretch of the campaign.
Click Activate.
From here, day-to-day management happens in Results and the Unified Inbox.
Best practice
Treat your first live campaign as a working draft even after it goes live. Launch small, watch the inbox, review results, then improve the flow based on what you learn. That approach consistently beats trying to build the perfect campaign before you have any live data.
It also beats trying to build the most elaborate flow on day one. A short, simple sequence you understand completely will teach you more than a long one you had to guess your way through.